

The Pythagorean Plaza is my attempt to have hammocks in the shade while camping--even if there are no trees around. There have been three iterations, one for each time that I have been to Apogaea: 2019, 2022, 2023. This post is for documenting the idea's progress
The Gem, 2019
Three hammock stands, a non-load-bearing PVC pipe roof, and a tensionable "belt" to keep the walls from collapsing outward. I think the bottom part resembles the shape of a cut gemstone.
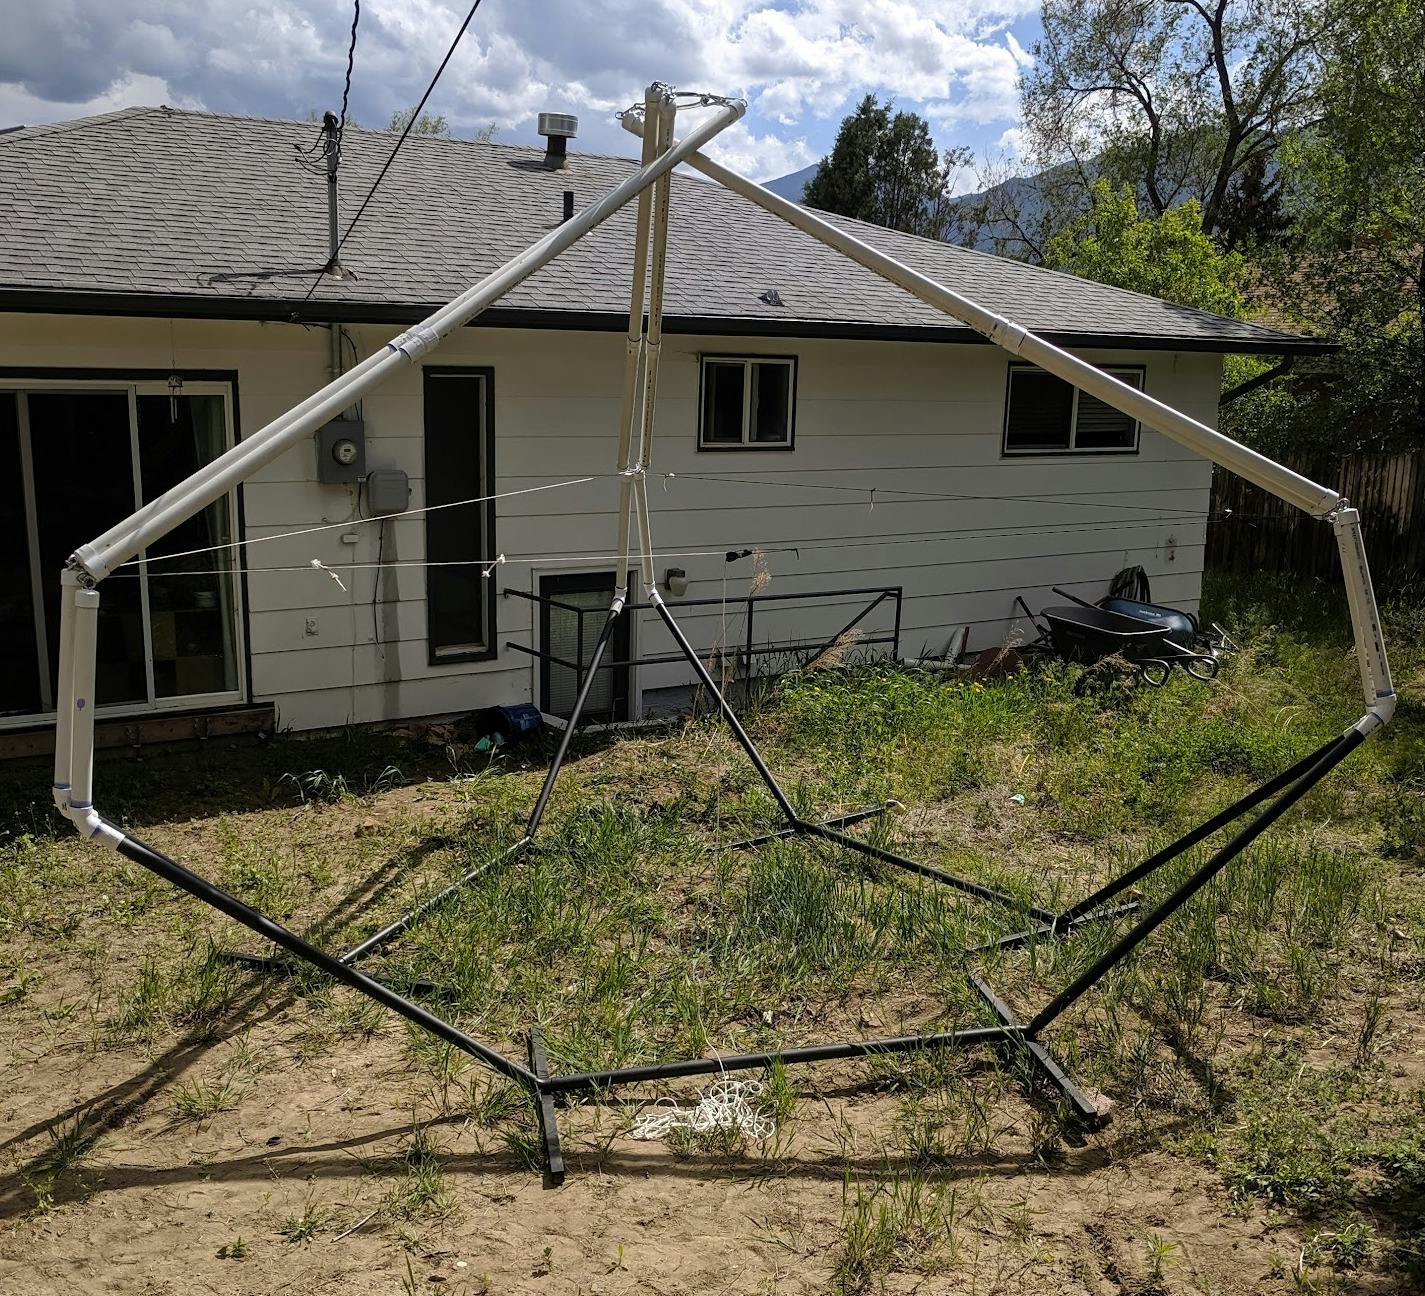
I put a single large polyester tarp over it. There is a hole in the middle of the roof for poles to poke through. I thought this would be sufficient to mitigate wind problems (spoiler alert: it wasn't).

Pros
Shade and rain coverage is near total
You can be confident your hammock will not fall down
Cons
When you sit down, the roof moves in unsettling ways
It's compatible with lounging hammocks, but camping hammocks (with bug nets and such) drape too low and will put your butt on the ground.
Pretty much a parachute, high winds broke straps.
Water pools on the roof. If the straps break, a pool falls on your friend.
The Octagon, 2022
My goal with The Octagon was to provide more hammocks, higher above the ground, and with a roof that does not shift when you sit down in.
I used schedule 40 steel pipe in various sizes. Lengths and diameters were chosen so that they could be stored inside one another (telescope-style) and fit in my truck's bed. For the vertices, I used sections of 4x6 lumber and fittings from simplifiedbuilding.com.
The need for diagonal downward supports was not anticipated but became apparent after testing. The finished version has eight diagonal supports:
4× downward supports to prevent wobble
4× roof supports
It was helpful to make every vertex support both types of diagonal support so that I could put supports where I needed them to prevent them from falling over during assembly.
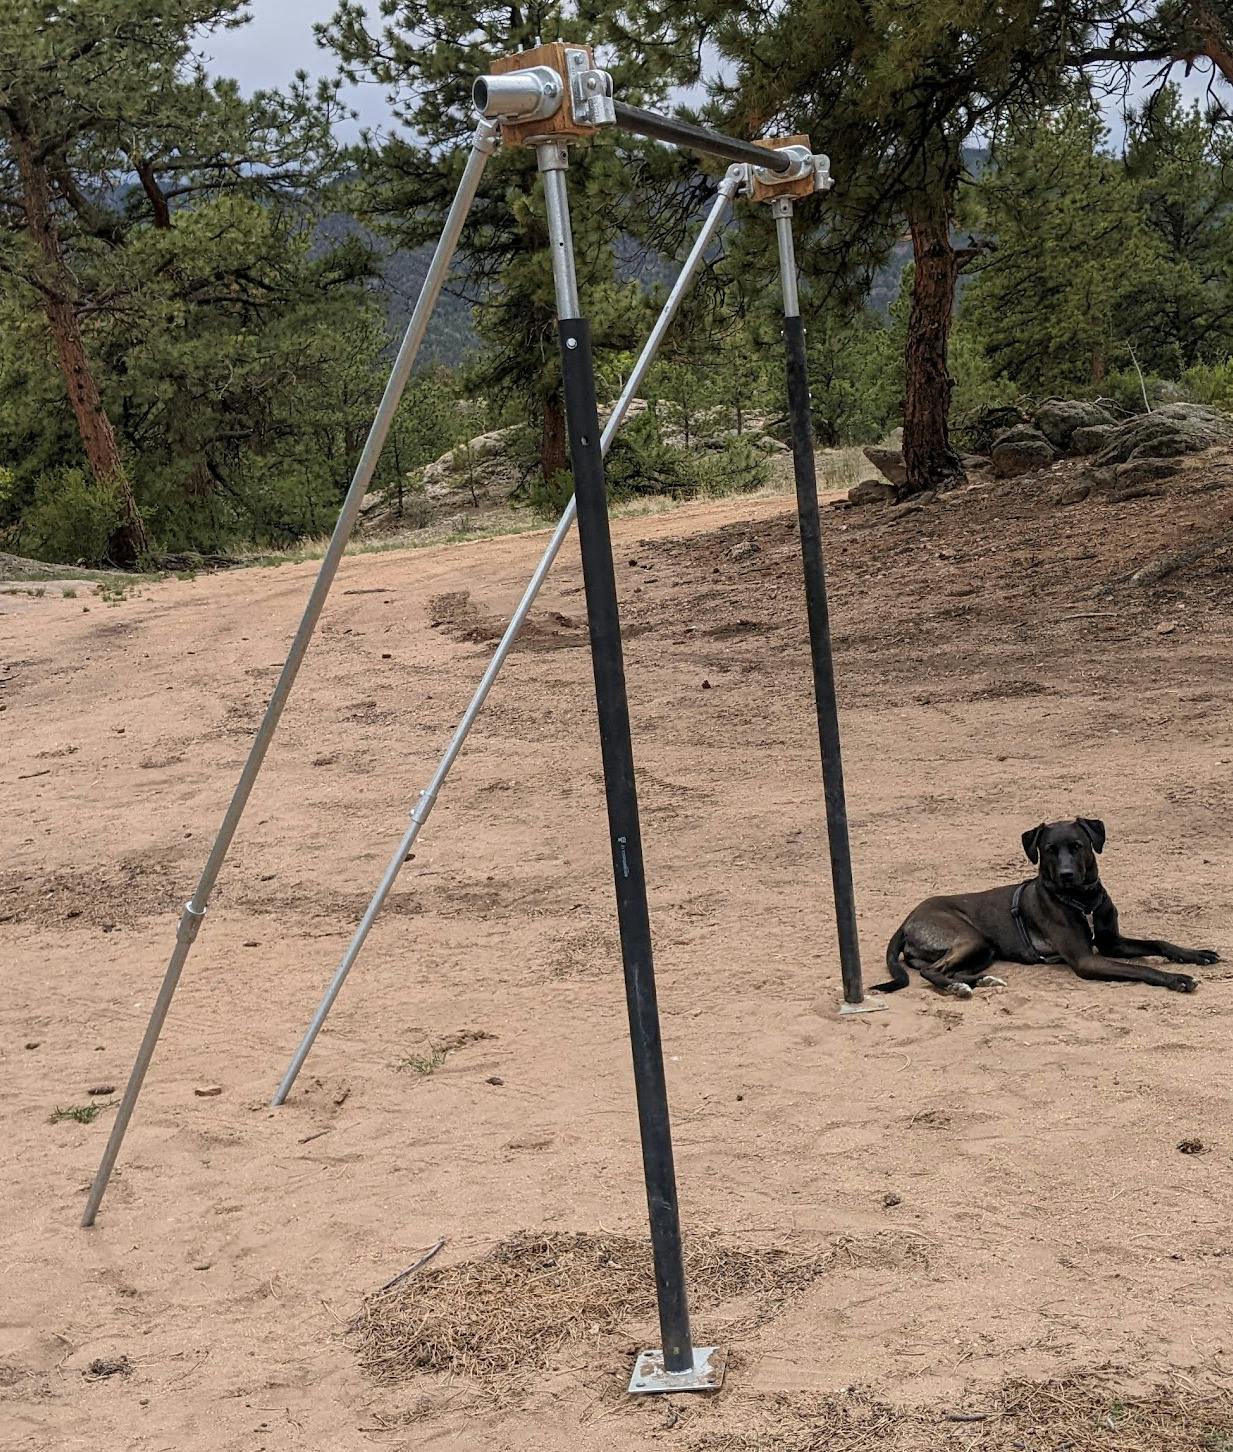
Pictured above is just one side wall, the lower vertical bars are the hammock-stand bars from The Gem. Roxie for scale.
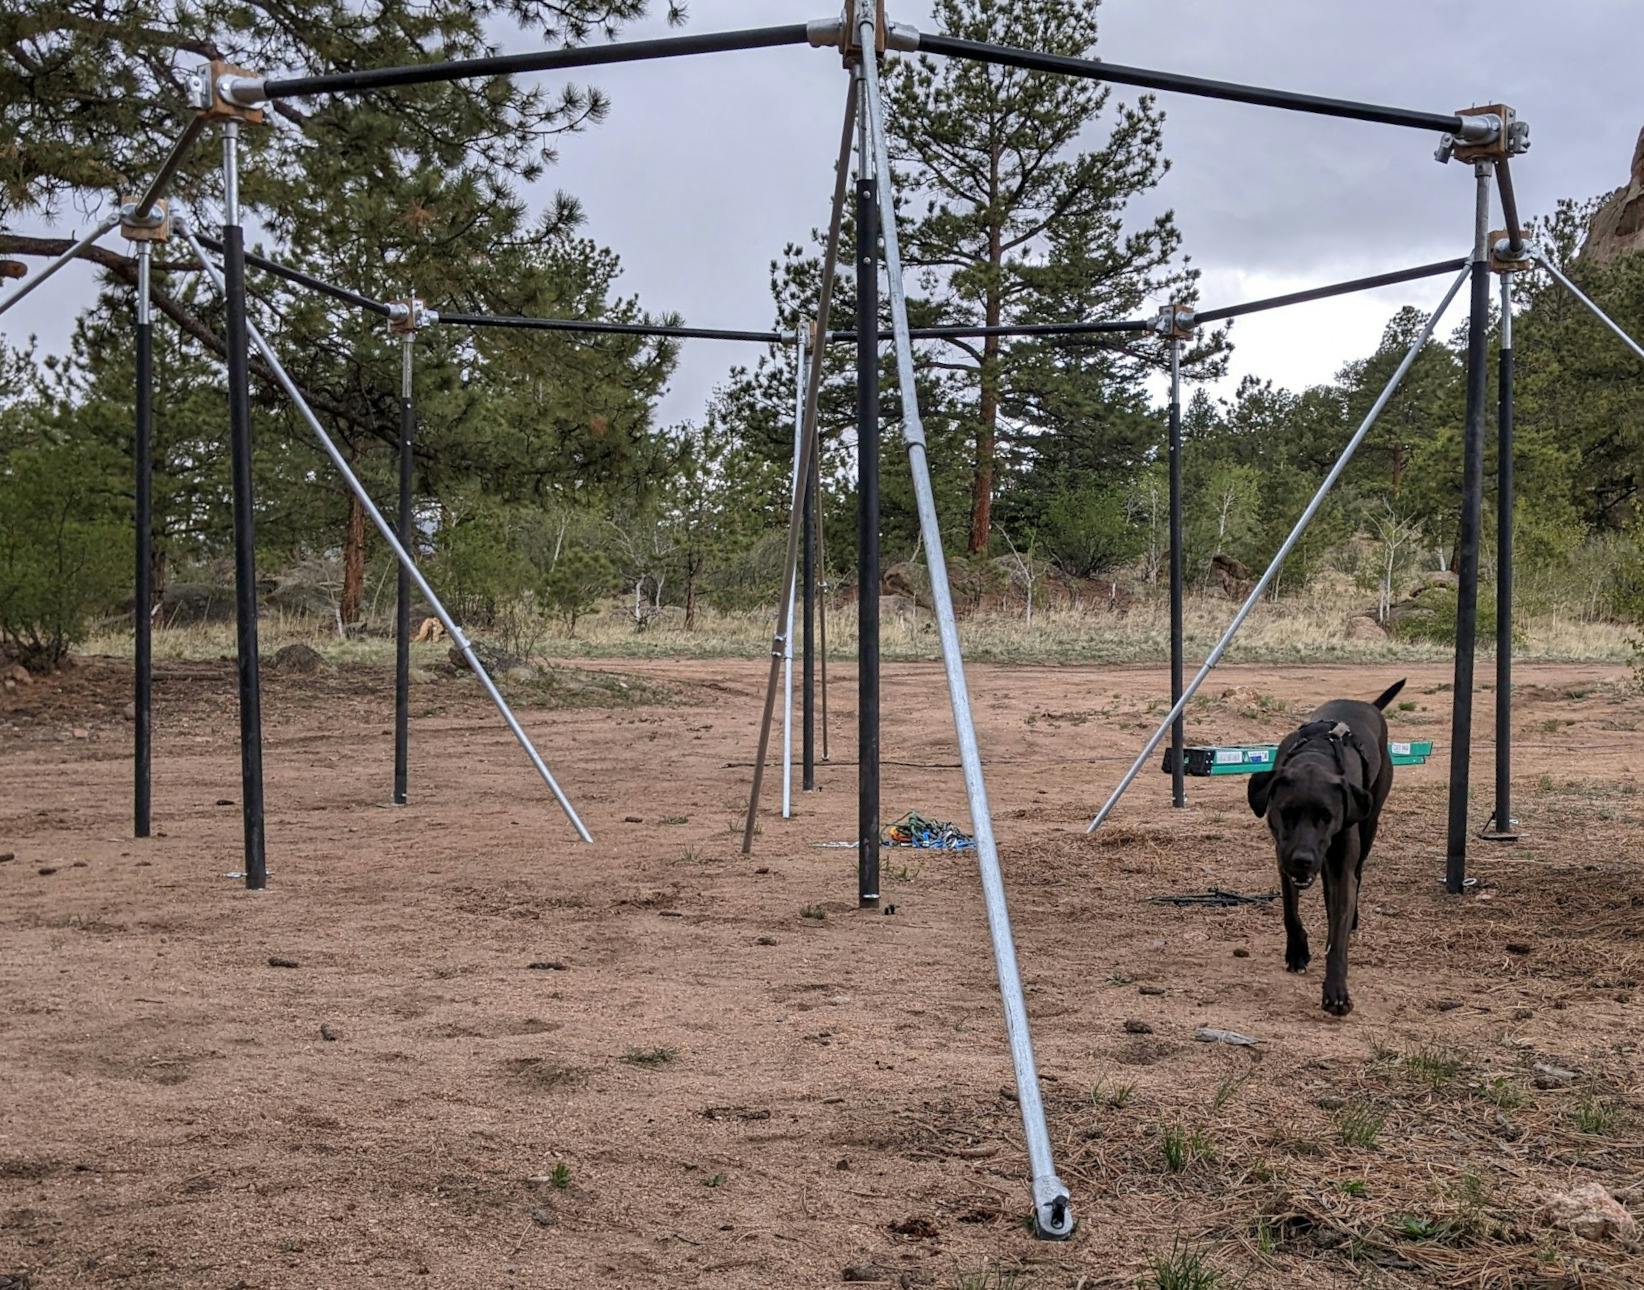
If it were a perfect octagon, all of the inner supports pictured above should be able to meet above the structure to create a relatively strong square pyramid. In practice, it was never a perfect octagon, so I could only get three of them to meet in the center. This kept the roof up but was not supportive of heavy loads.
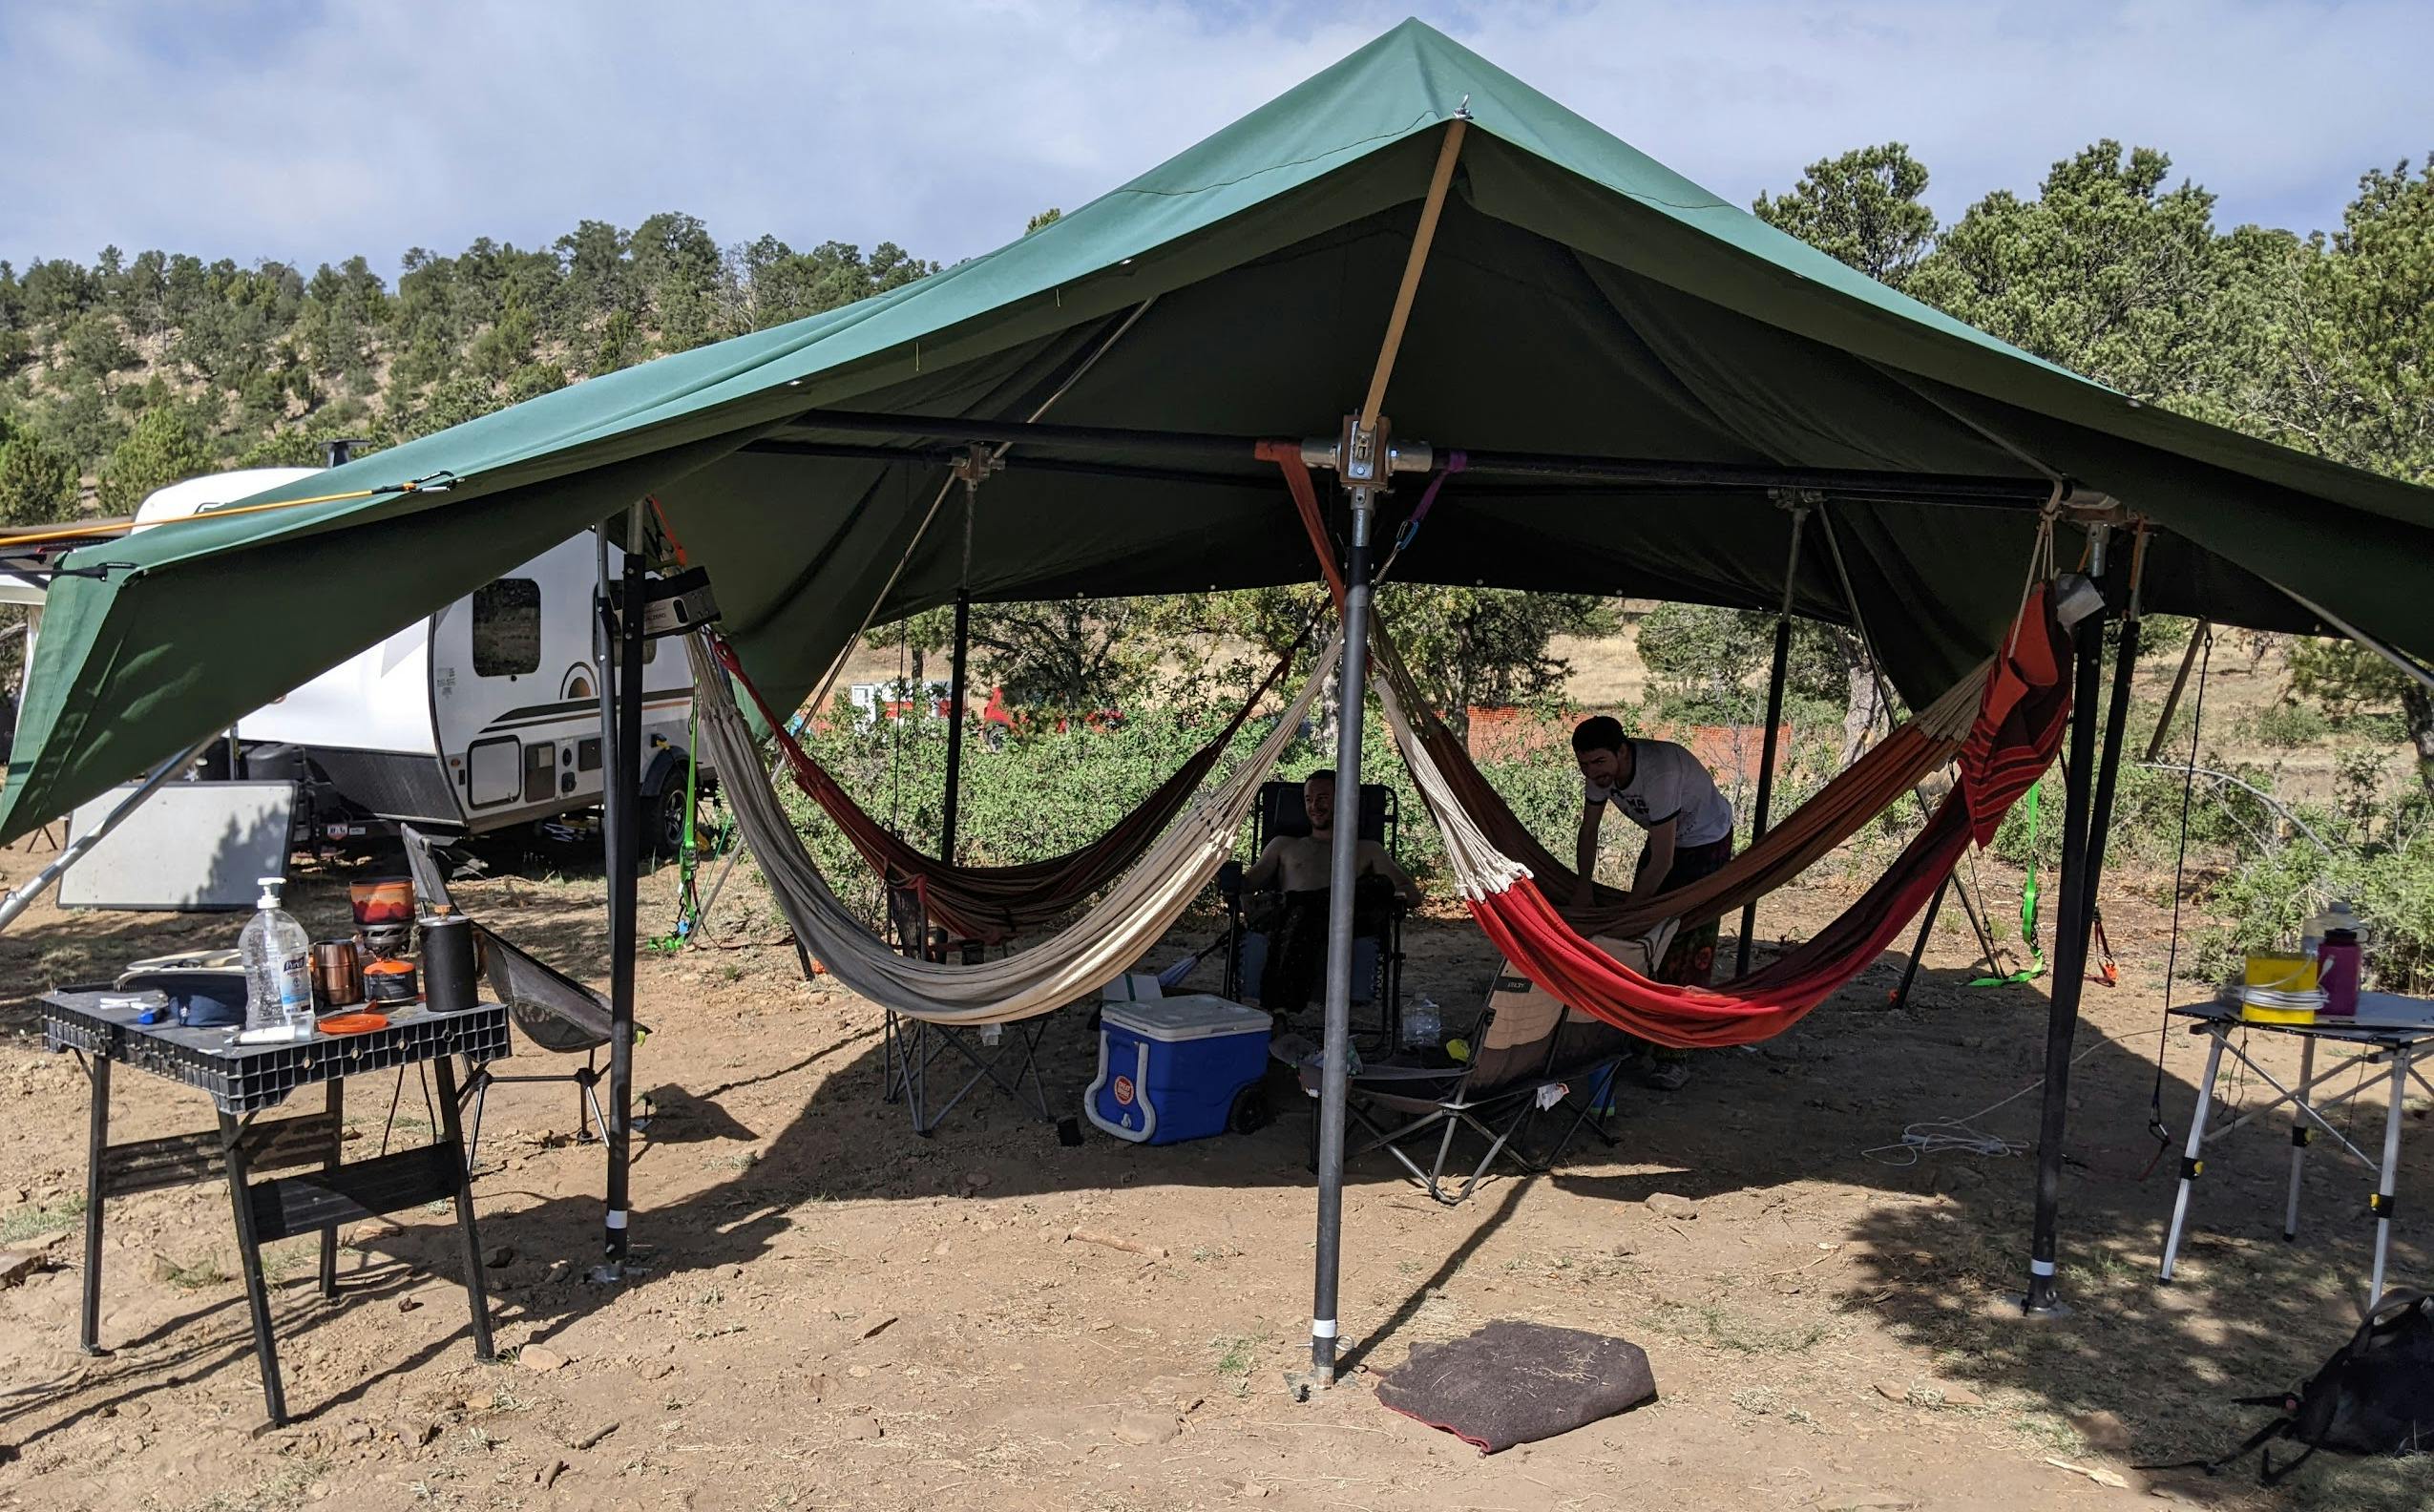
I don't have a direct picture of it, but notice the left corner of the tarp here. Each corner has five bungee cords to distribute the load across five tarp eyelets. Those connect to a pole which is then guyed out with ratchet straps to three stakes.
The roof never ripped off, but only because we were continually re-positioning the stakes as strong winds caused them to pull out of the ground. Because of this experience, I now consider a 20x20 tarp to be too hazardous to use while camping--if it had been much windier, there would have been hazardous moments.
Pros
Four hammocks (+1 from before)
The hammock distances felt right (it was as if the hammocks hung from the top corners of an 8-foot cube).
I learned how to tap threads into metal.
Hammocks felt well supported, even with mild swinging
Tarp was tensioned such that water did not pool on the roof
Cons
8 vertical supports with two height settings made of two poles and held together with 4 bolts = 32 bolts and 64 tapped holes. The setup was long and tedious.
Four pole sizes meant four different hex keys for the fittings, which made it hard to harness communal effort (I should have gotten more tools and color-coded them).
Pole sizes that telescope in theory may not telescope in practice. Instead of four telescoped poles (1 < 2 < 3 < 4) I ended up with two sets (1 < 3 and 2 < 4).
One big tarp has the same wind problem as before
New Goals
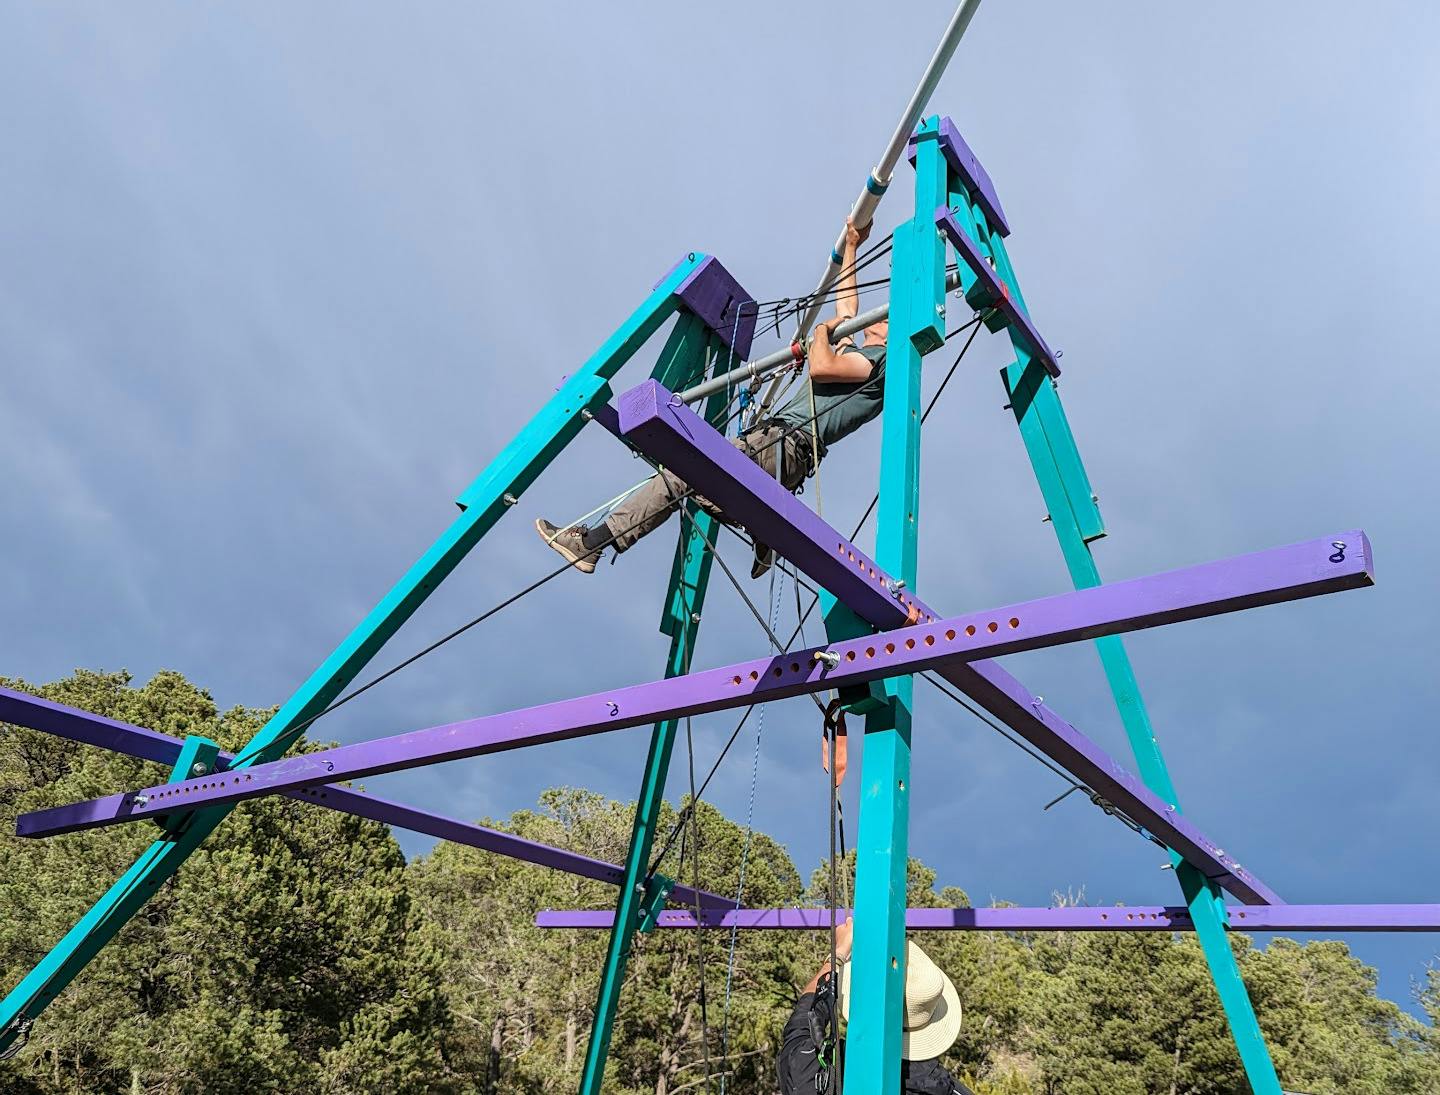
It was record-breakingly hot at the 2022 Apogaea. Some activities require tall things that are difficult to put in the shade.
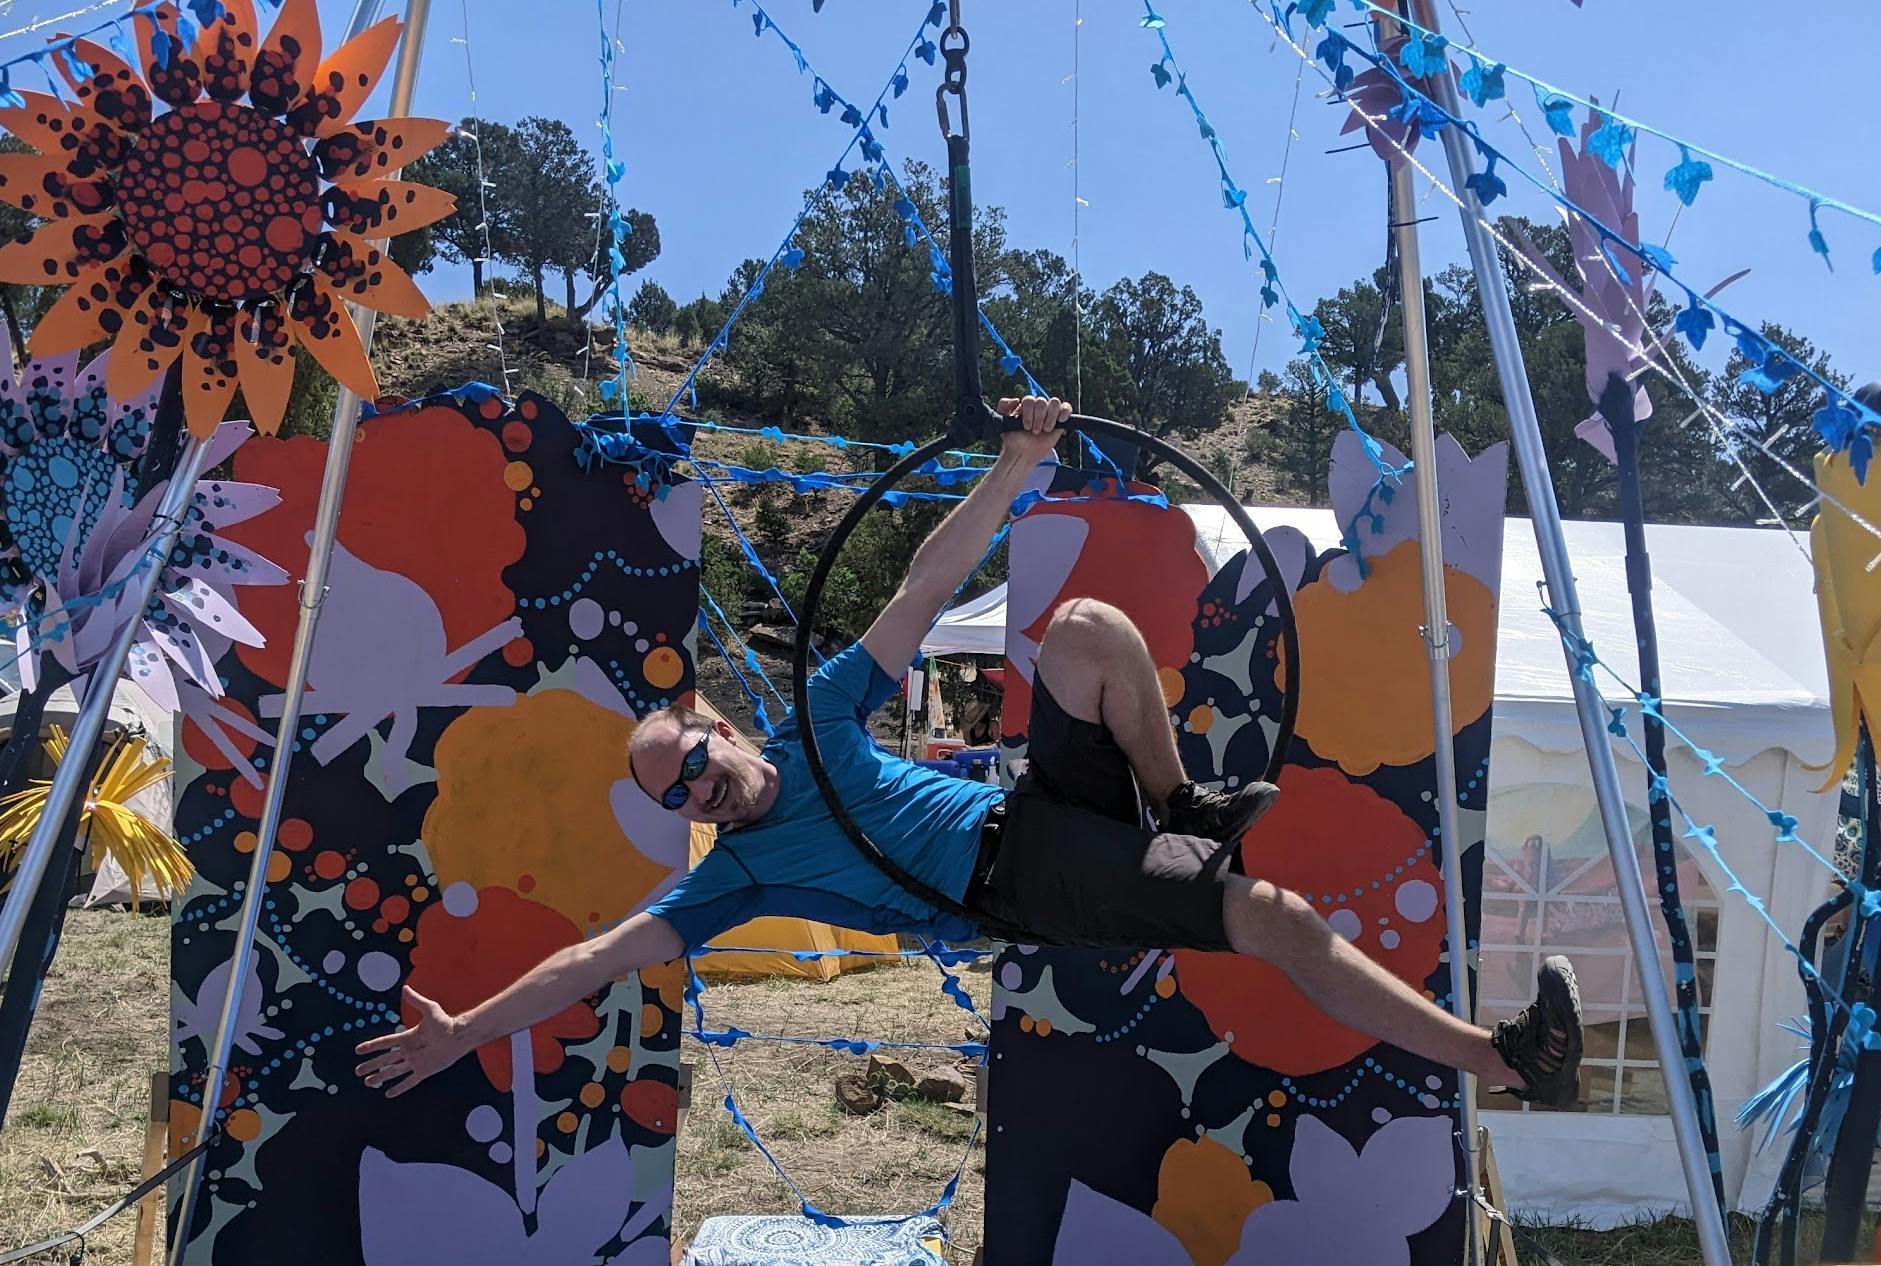
The aerial rig pictured above was tremendous fun, as you can see from this student's face. Our teacher was doing a great job of inspiring an interest in the activity (I've since started taking classes). But most of the day was too hot for exercising in the sun, so the activity got cut short.
This got me thinking:
Can I create a load-bearing apex that makes shade for an aerialist?
Also, the bungee cords seemed to help with the wind problem--but the single tarp was still a problem.
What about multiple tarps, with lots of give?
In Support of Aerials, 2023
This year, I got started early. I prototyped and scrapped three designs.
Since the previous year, I had been thinking pyramid thoughts. The aerialist could hang from the apex, and the hammocks could hang mid-beam. The challenge here is that a vertically loaded diagonal beam is stronger if it is mostly vertical, which suggests a very tall pyramid.
But I don't have a crane, so how am I going to build it?
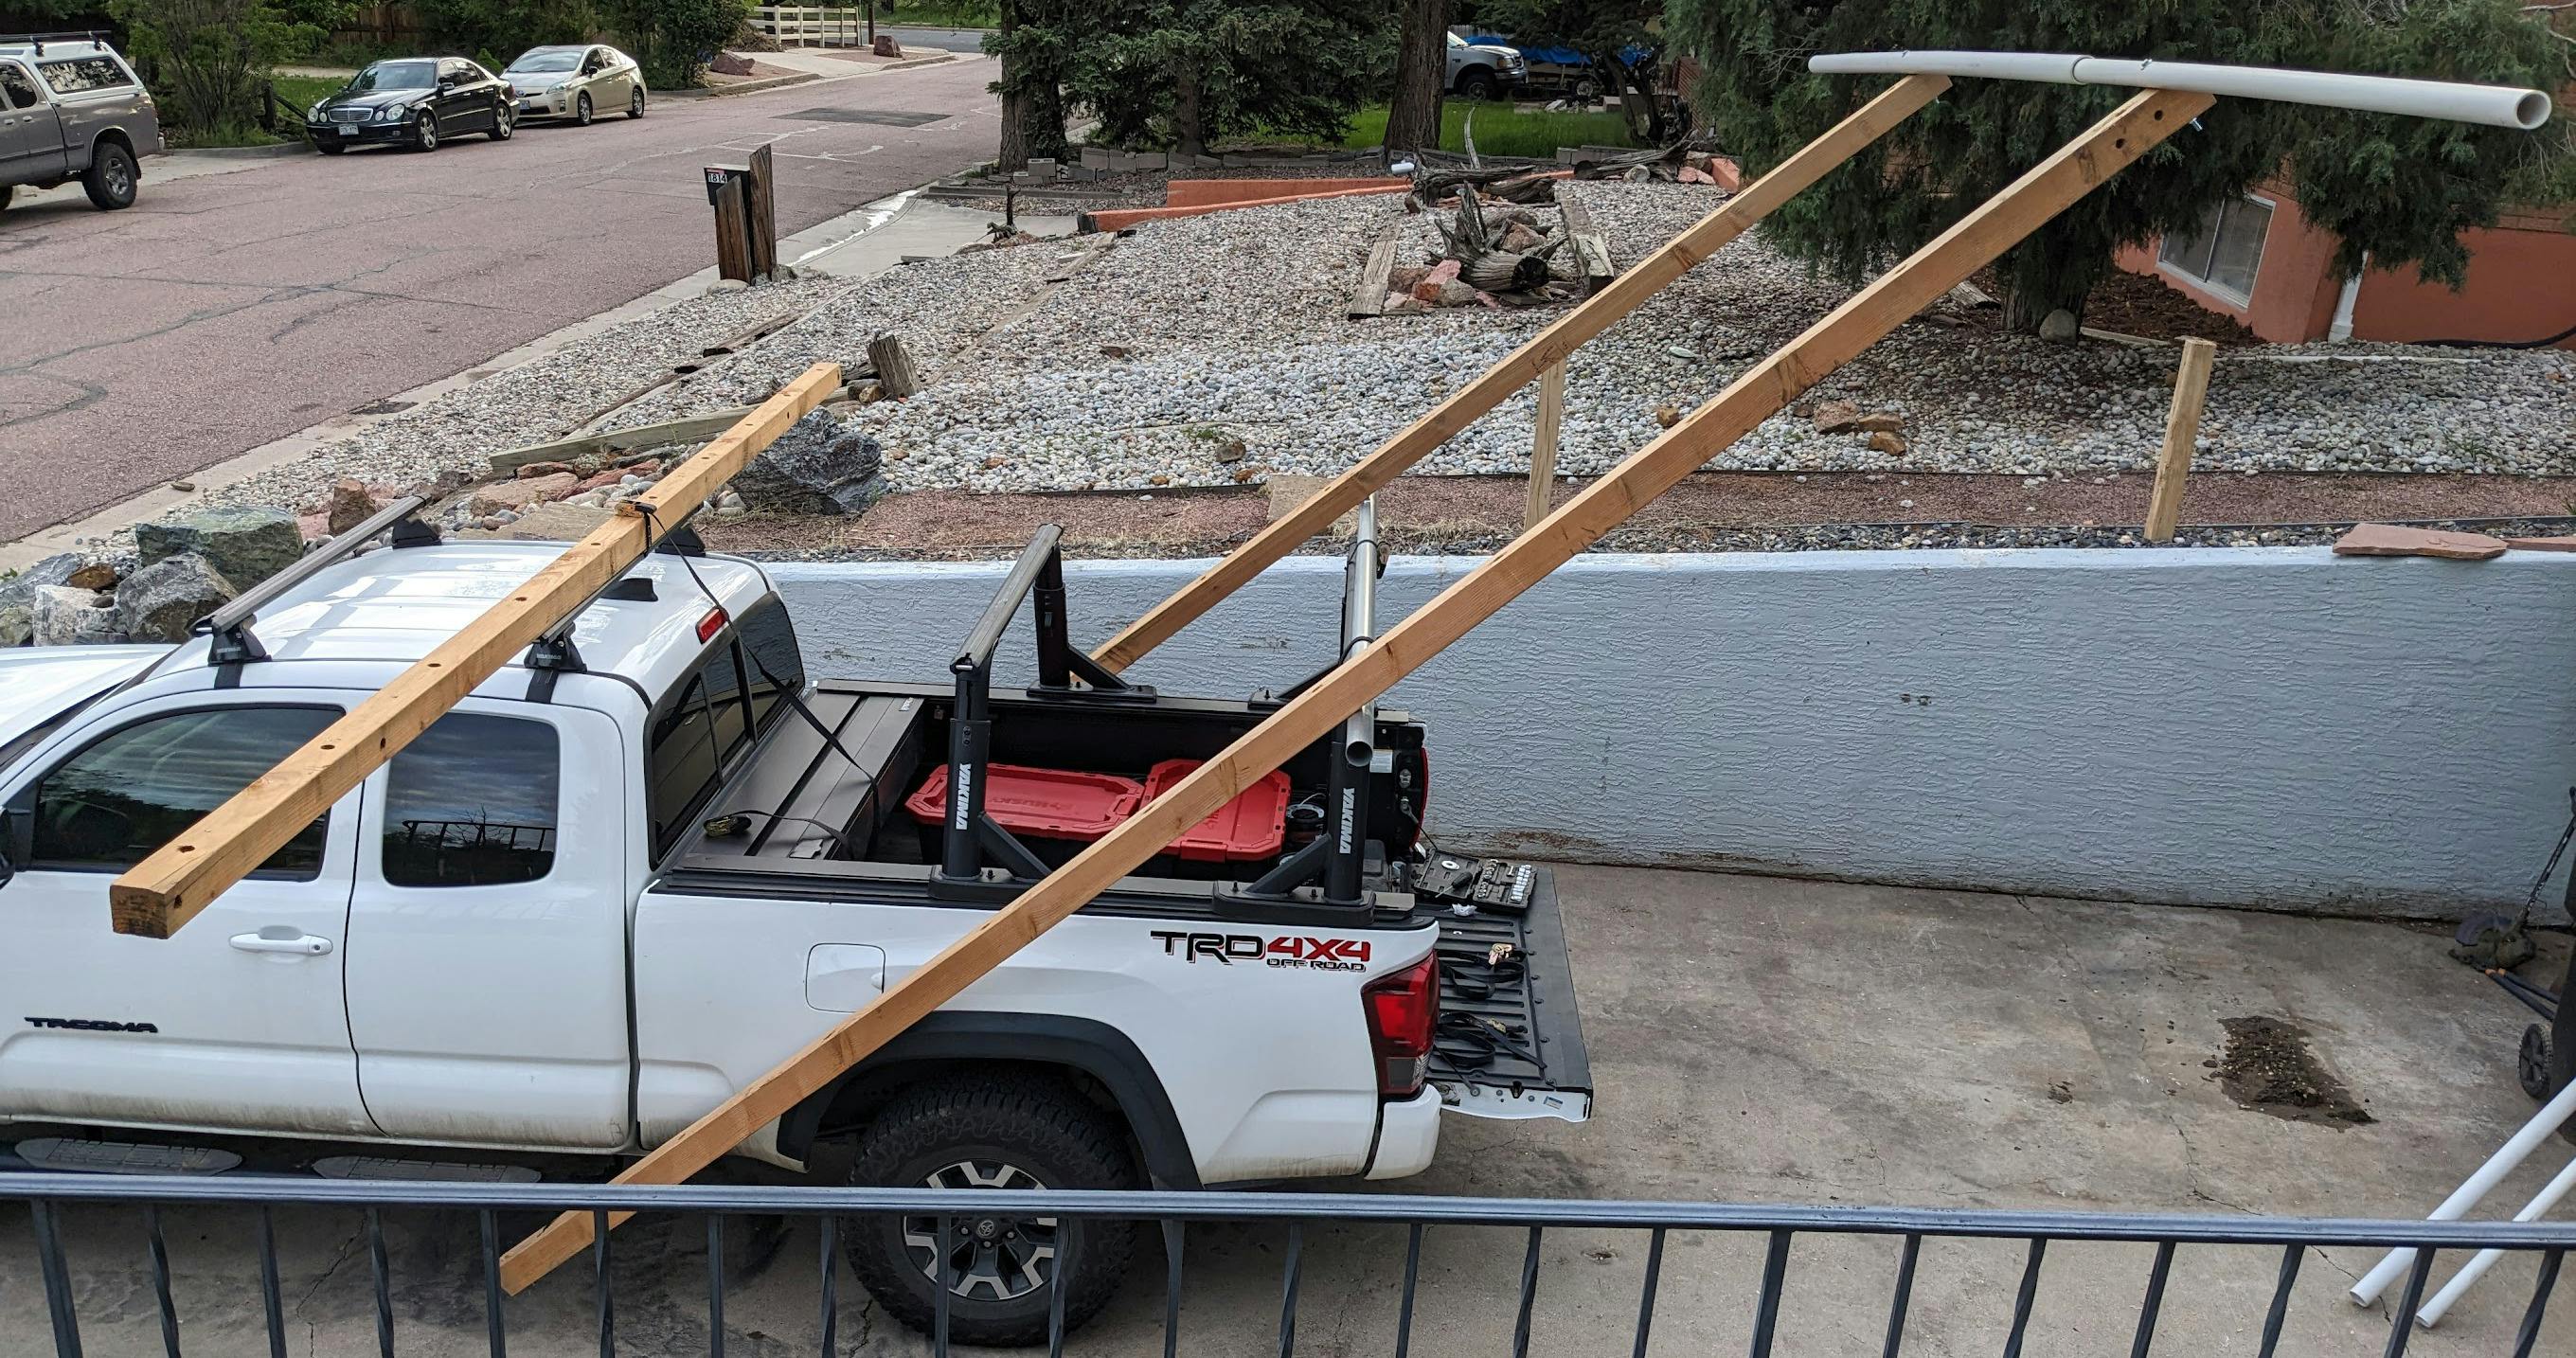
I was also trying to avoid having to do anything 32 times for each setup, having learned that lesson from The Octagon. I got some racks for my truck so that I could transport 16-foot beams instead of limiting myself to 6-foot ones.
Flash-forward, here's how that ended up looking:
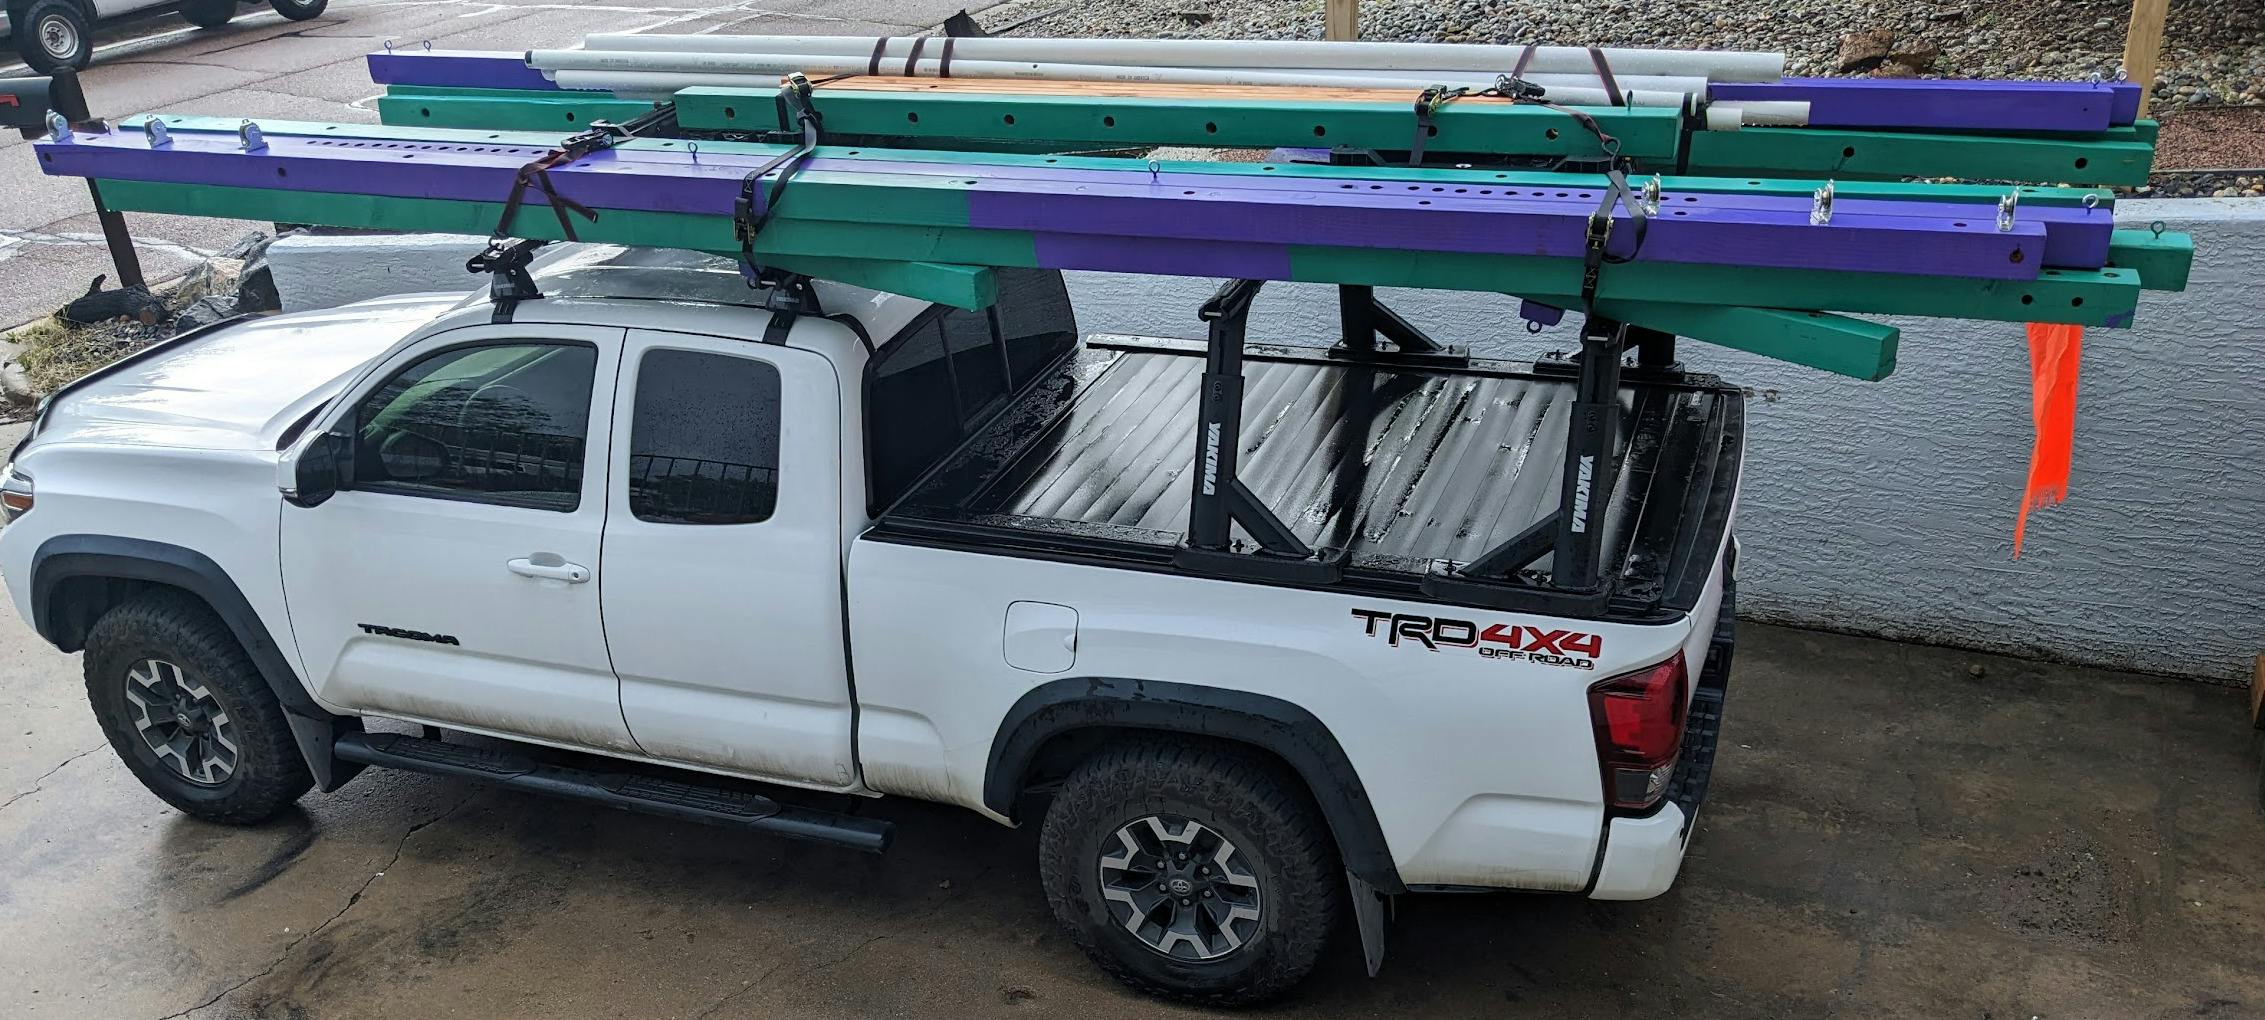
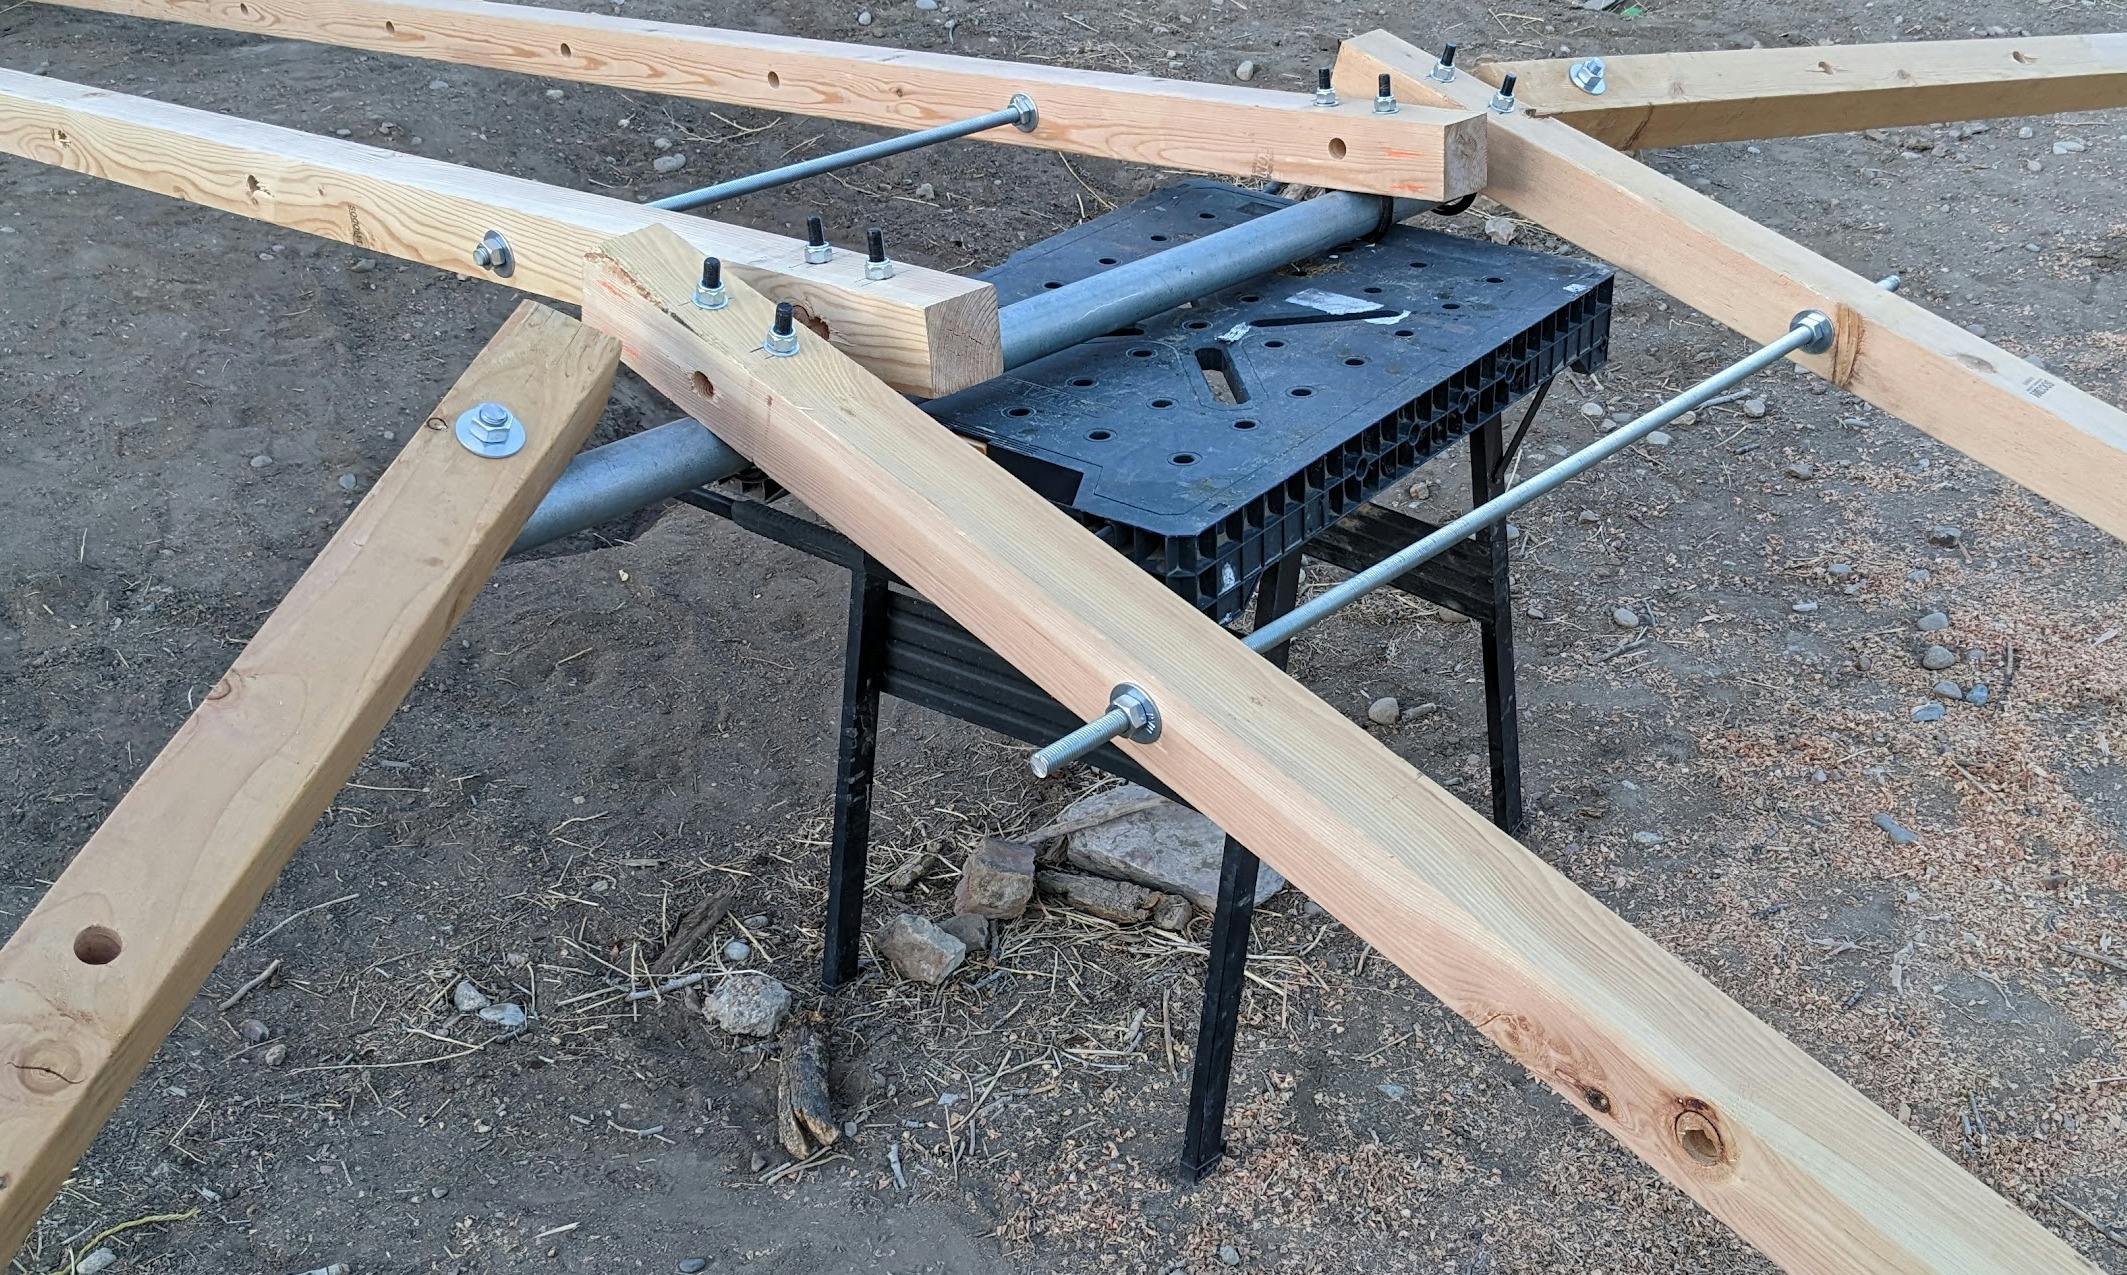
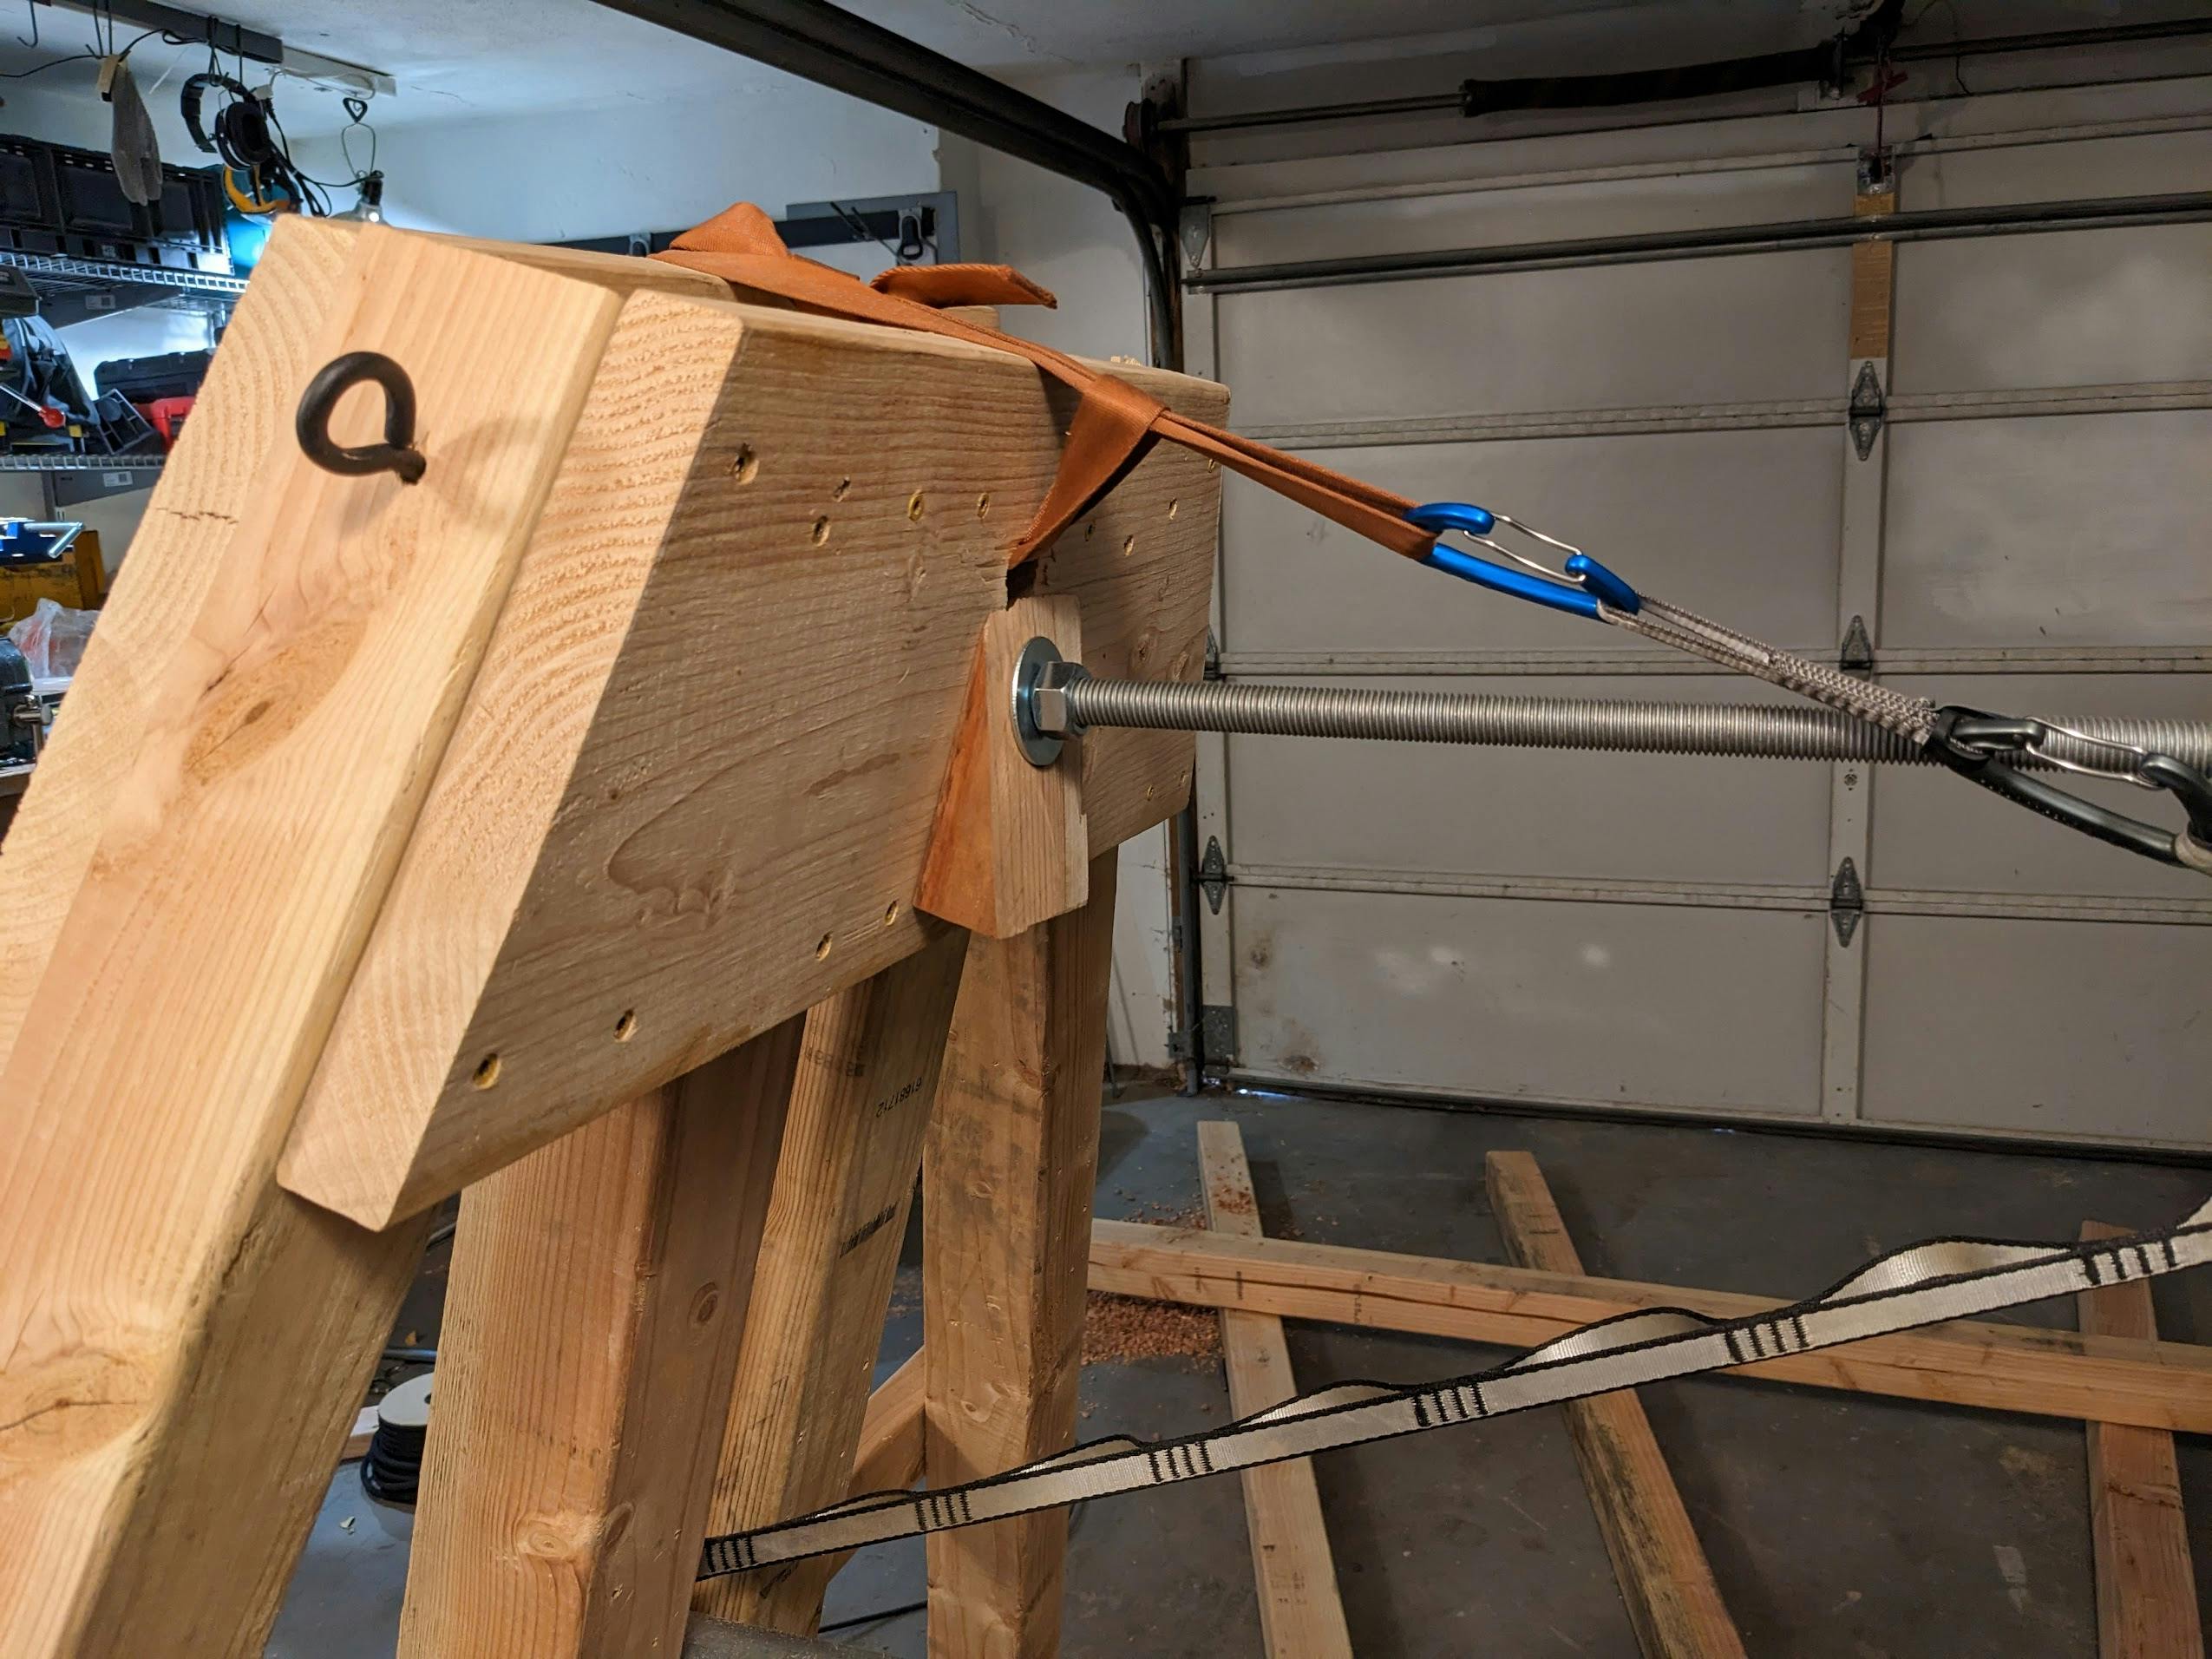
I wasn't sure how best to connect this lumber, but I knew that I didn't want to use 1/4-inch bolts as I had used on The Octagon. The threads are too small: grit gets in them and they're too easy to strip.
Failure 1: The Hanging A
I started with the apex, held together by lag bolts and a 3/4-inch threaded rod:
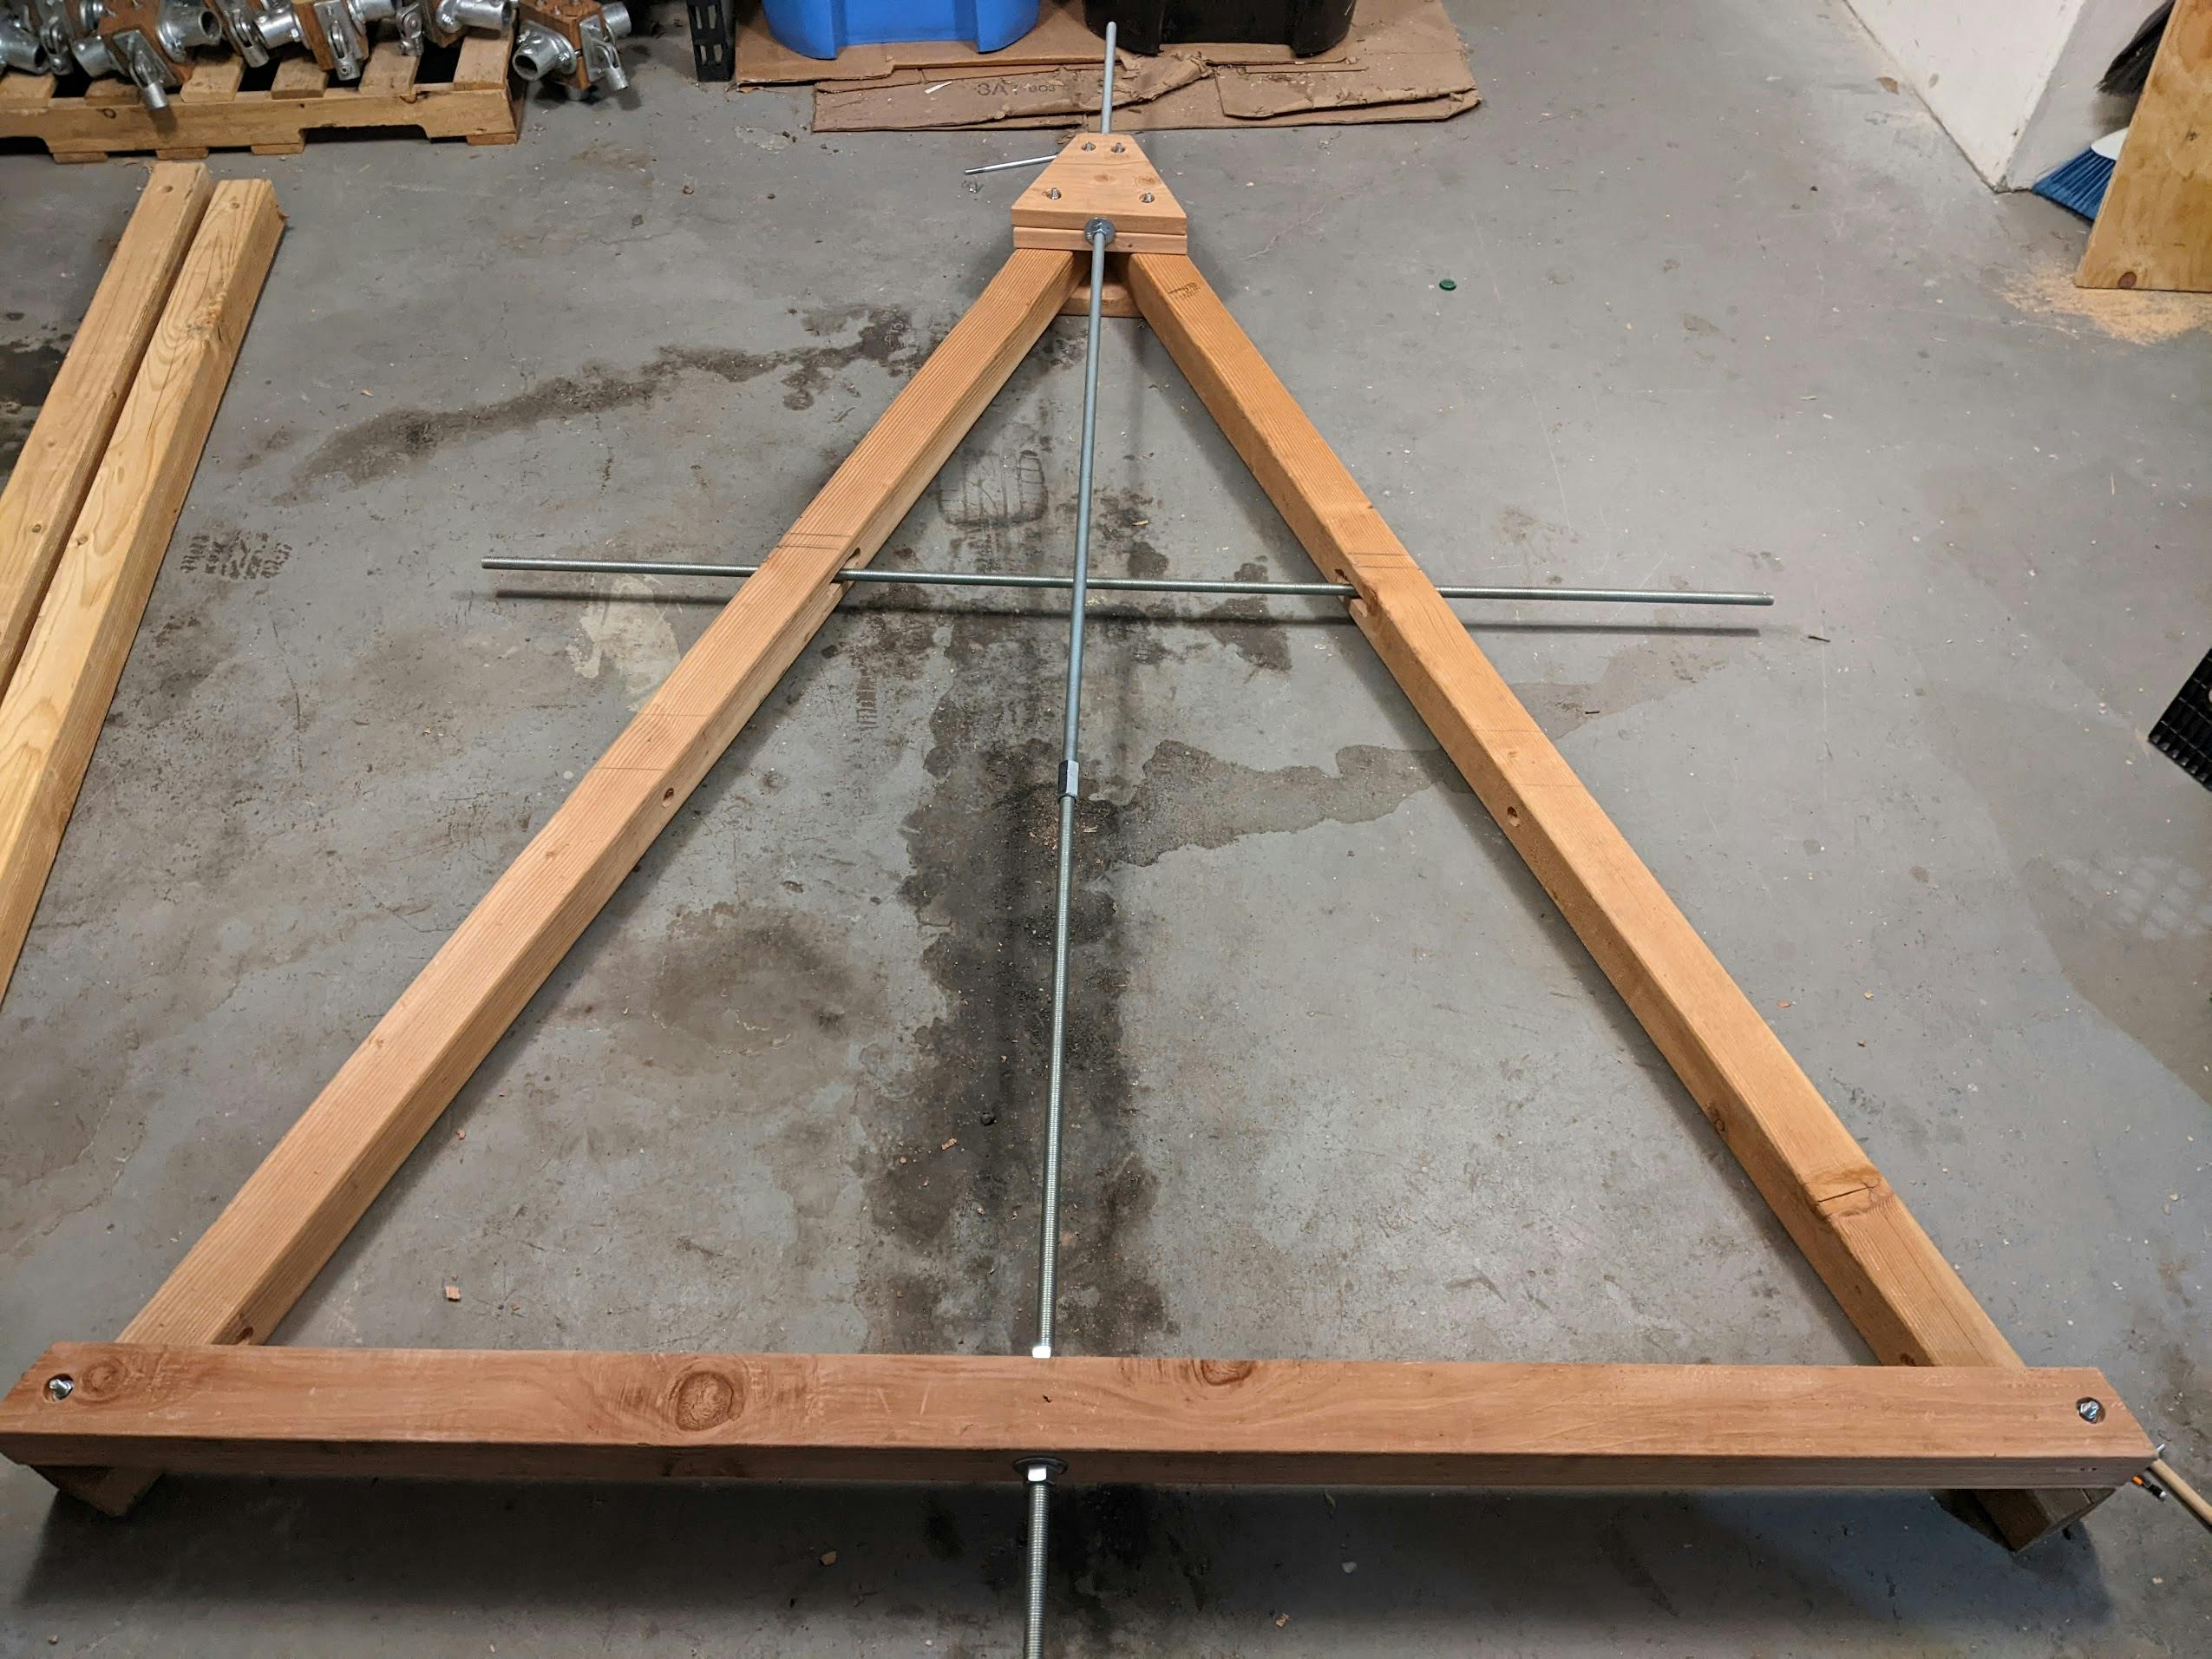
The idea was that I would hook many narrow (isosceles) triangular tarps to the top of the vertical rod, and they could be positioned differently depending on where the sun was.
As for the horizontal rod, it was a pivot point. I threaded it through the top rung of a ladder on one side, and around a threaded rod between two beams on the other side. To erect it, I used a block and tackle to pull the ladder's base toward the opposing beams.
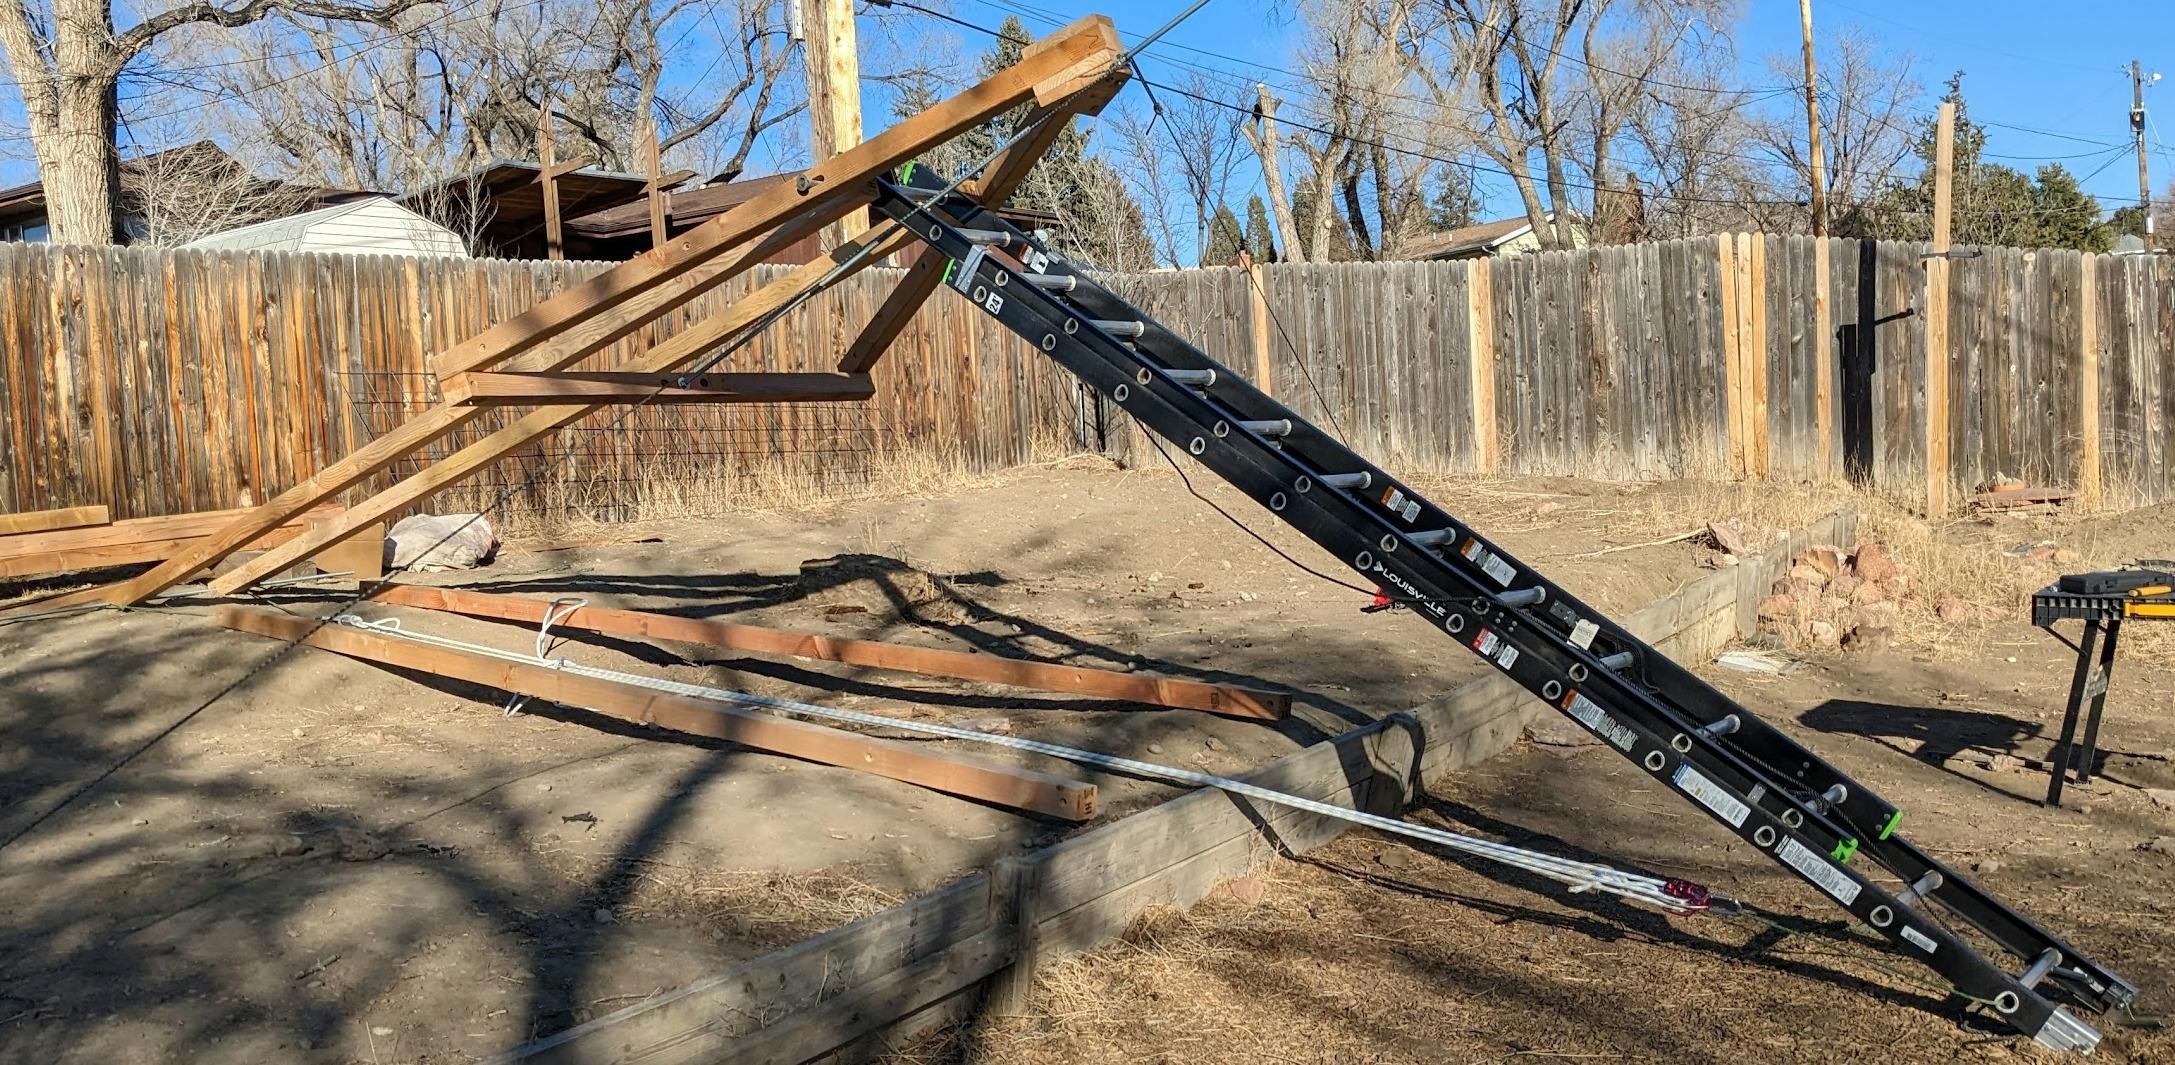
This was fun, but a bit scary. The tension in the ropes was pretty significant and the whole assembly wanted to pitch to either side. I ended up using guy wires to keep it centered. These I loosened gradually as I tightened the rope at the base to make it taller.
Eventually, it was tall enough that I had room to connect 16-foot legs to the A-frame. This was an interesting thing to manipulate, it had two modes:
ladder and beams pulled in, side legs floating (it typically tipped to one side or another)
side legs loaded and either ladder or beams loaded
By alternating between the modes I could un-stress any one of these four supports, a capability that I used to make them longer. By the time I was happy with it, it positively towered over my neighborhood.
In this mode, I discovered that the ladder was too bouncy to be hanging hammocks from. I planned to replace it with more beams, but before I managed to get that far, disaster struck.
Extension ladders have a widget that toggles between two states:
Support
Collapse
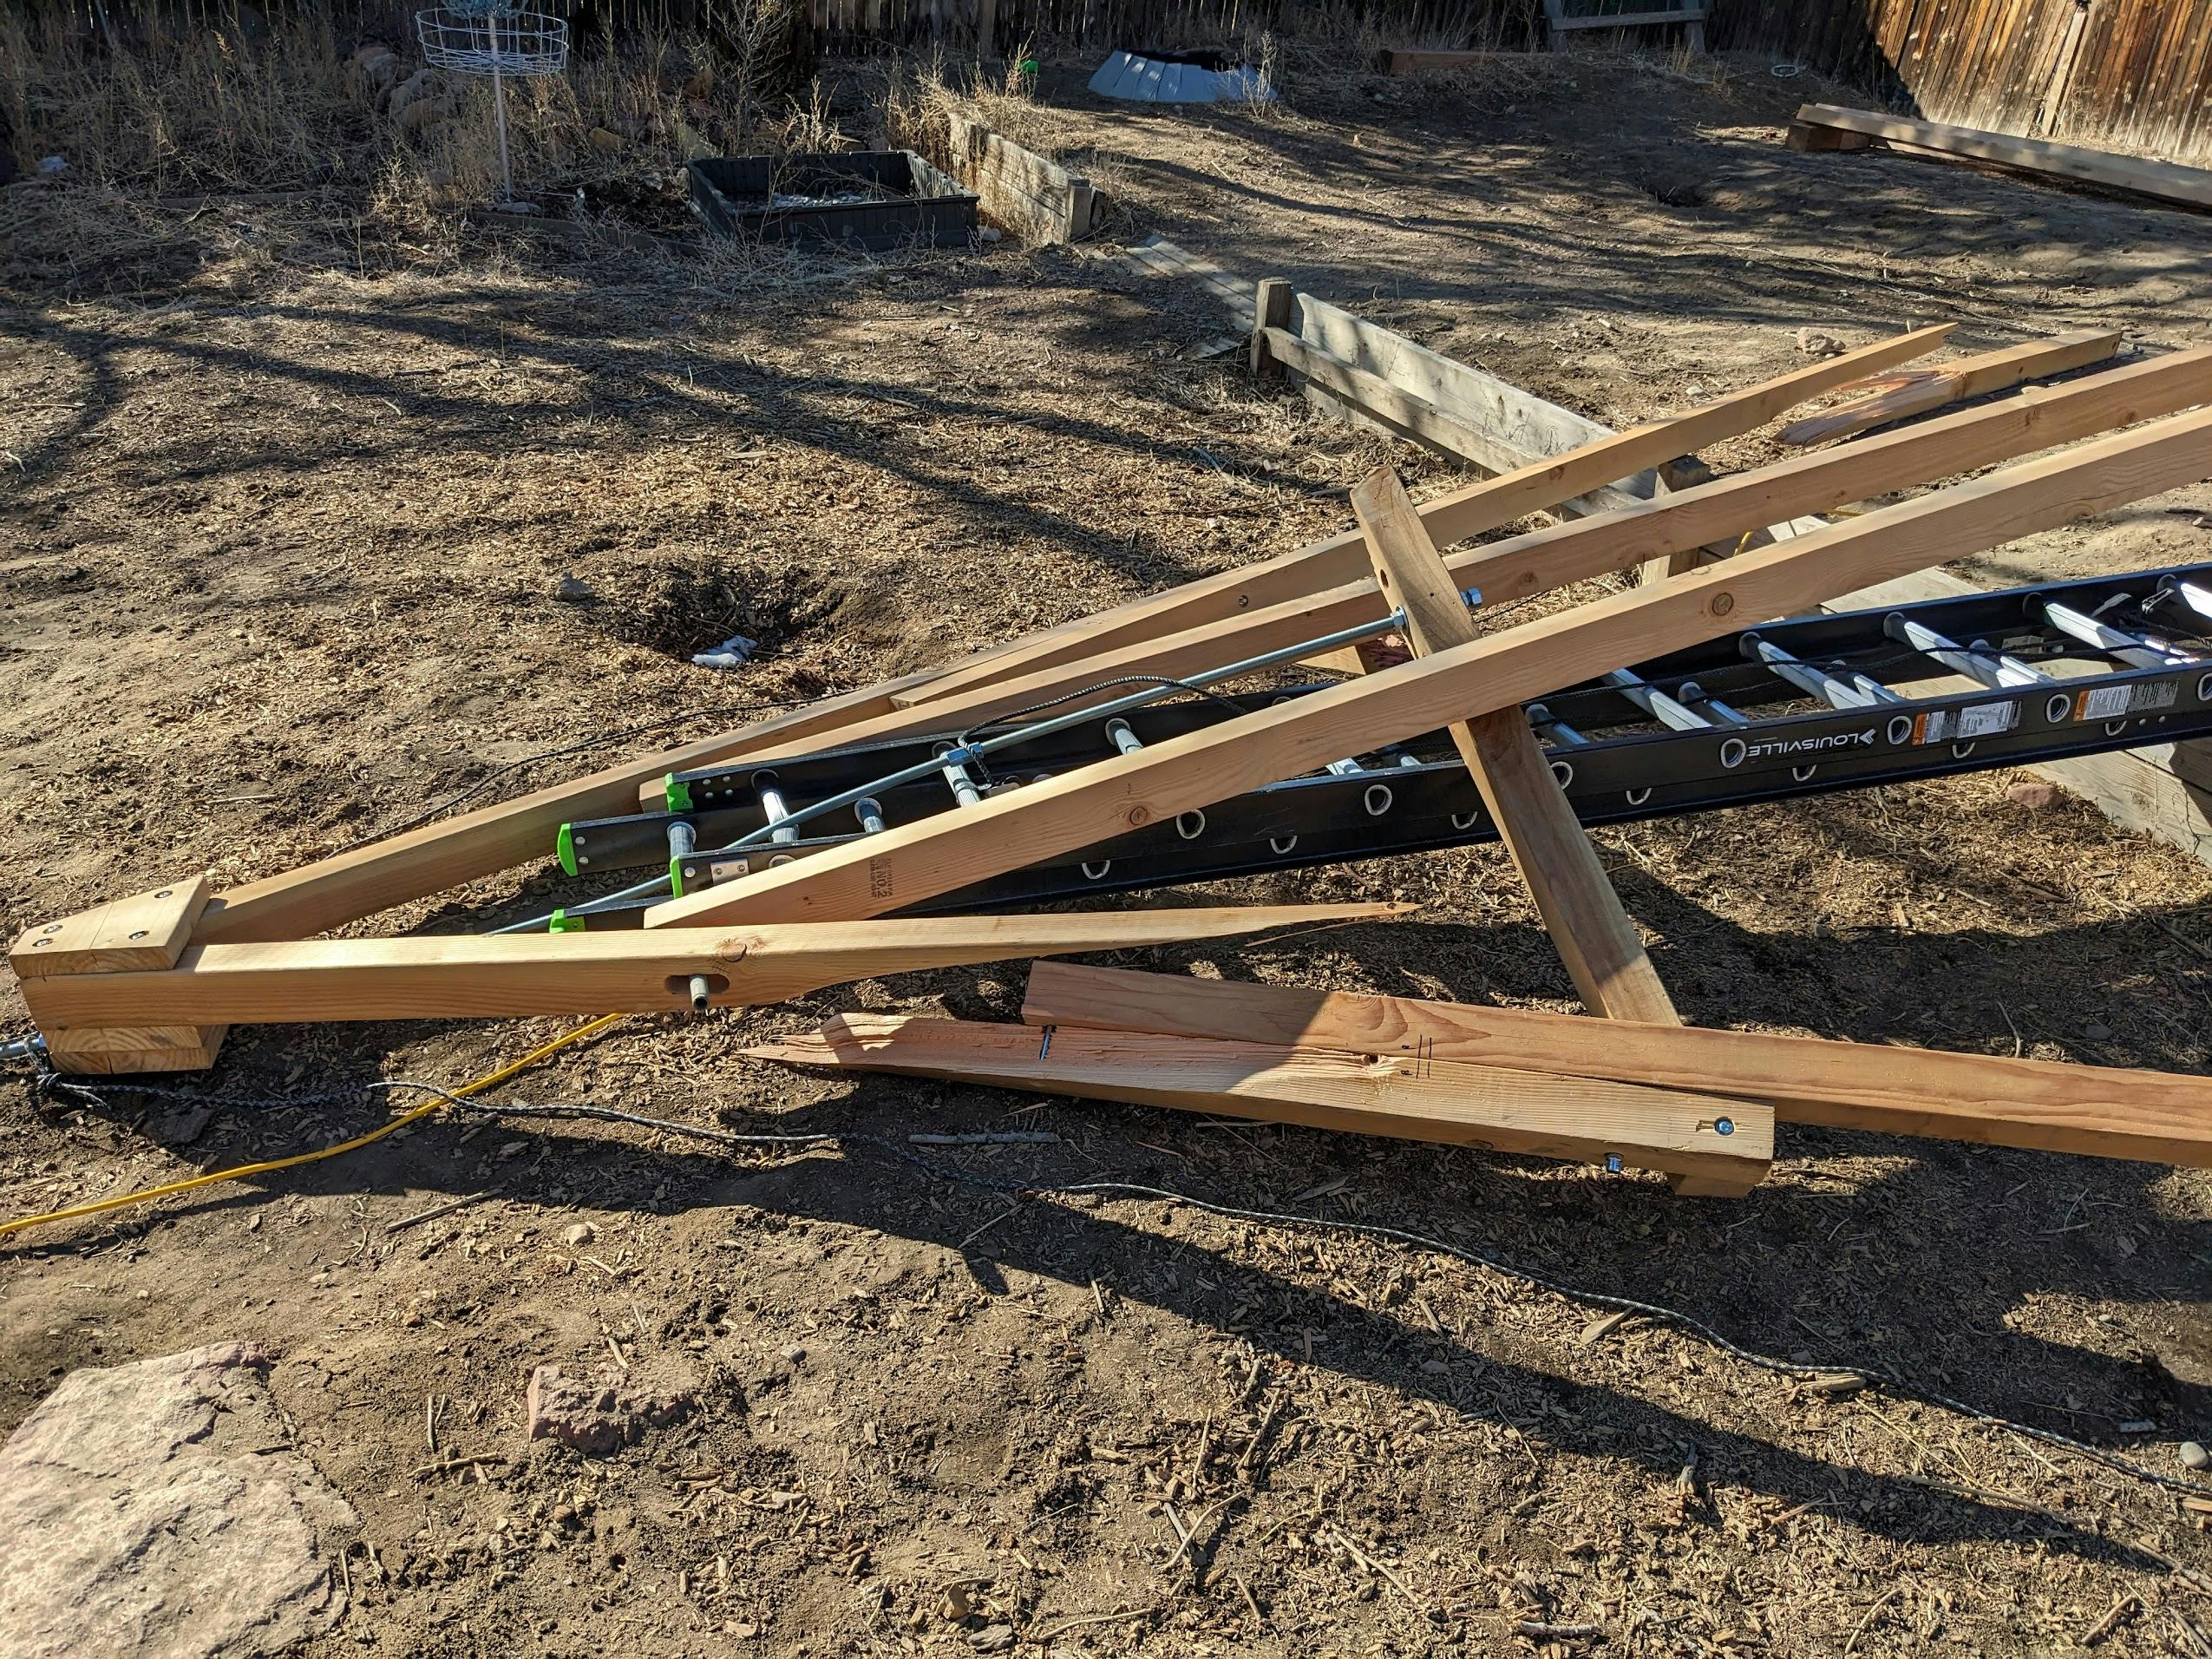
While manipulating the contraption, I allowed these to be in the wrong state, and the whole thing came crashing down. I'm lucky that this happened in my backyard and not at an event.
Lesson learned: I am not smarter than a ladder, and shouldn't build with them.
Failure 2: The Toprope
I knew that the hanging-A concept worked from a construction and manipulation perspective, but I was a bit afraid of going that tall again. I knew I'd need the roof to be slightly higher than the aerialist's anchor point, but this was six feet higher. That's overkill.
I found myself eyeing the large metal poles that are found at the top of routes in climbing gyms. Absent a ladder, maybe I could use climbing equipment (and a belayer) to reach the top.
Having replaced the ladder with a (much heavier) pair of beams, it was simply too heavy. I couldn't pull it erect.
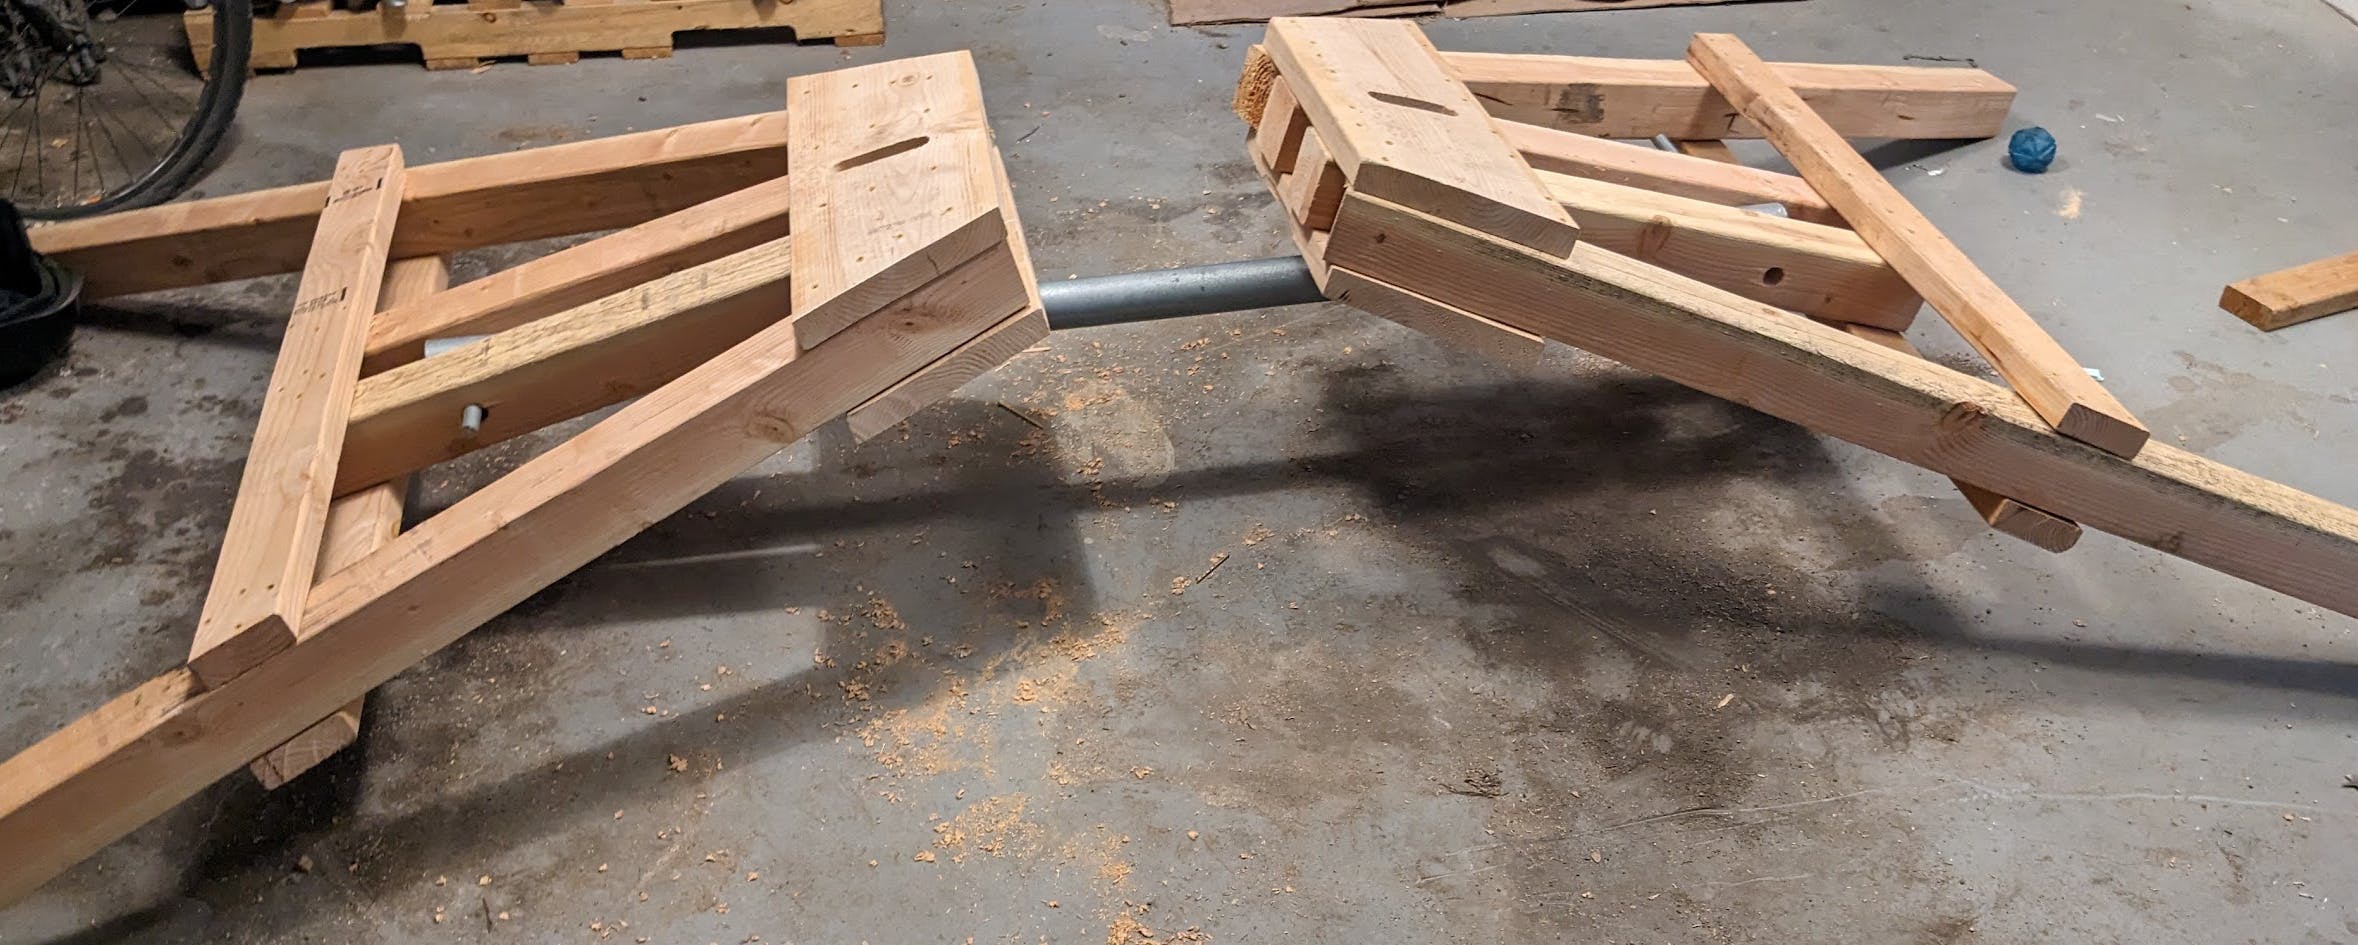
Failure 3: The Spider
This is dumb. I tried to form a square pyramid and somehow talked myself into using six diagonal beams. How about just four? Instead of coupling the pairs so they resemble ladders, I'll keep them in place with climbing webbing. That way they can rotate outward as well as downward.

This was not especially scary to erect, and it seemed stable enough, but it had a different problem.
Four Hammocks around this thing would pull inward when people sat down in them. These 16-foot beams would not be strong in that direction, so I'd have to add cross beams. This had been the plan all along, but the problem was that each of these legs was rotated in a way that made attaching the cross beams difficult.
I suppose I could've used something other than 3/4-inch all-thread rod. Rope maybe. But I was relying on the rigidity of these cross beams to stabilize any wobble that occurred in the beams (which didn't work, instead they just all wobbled together).
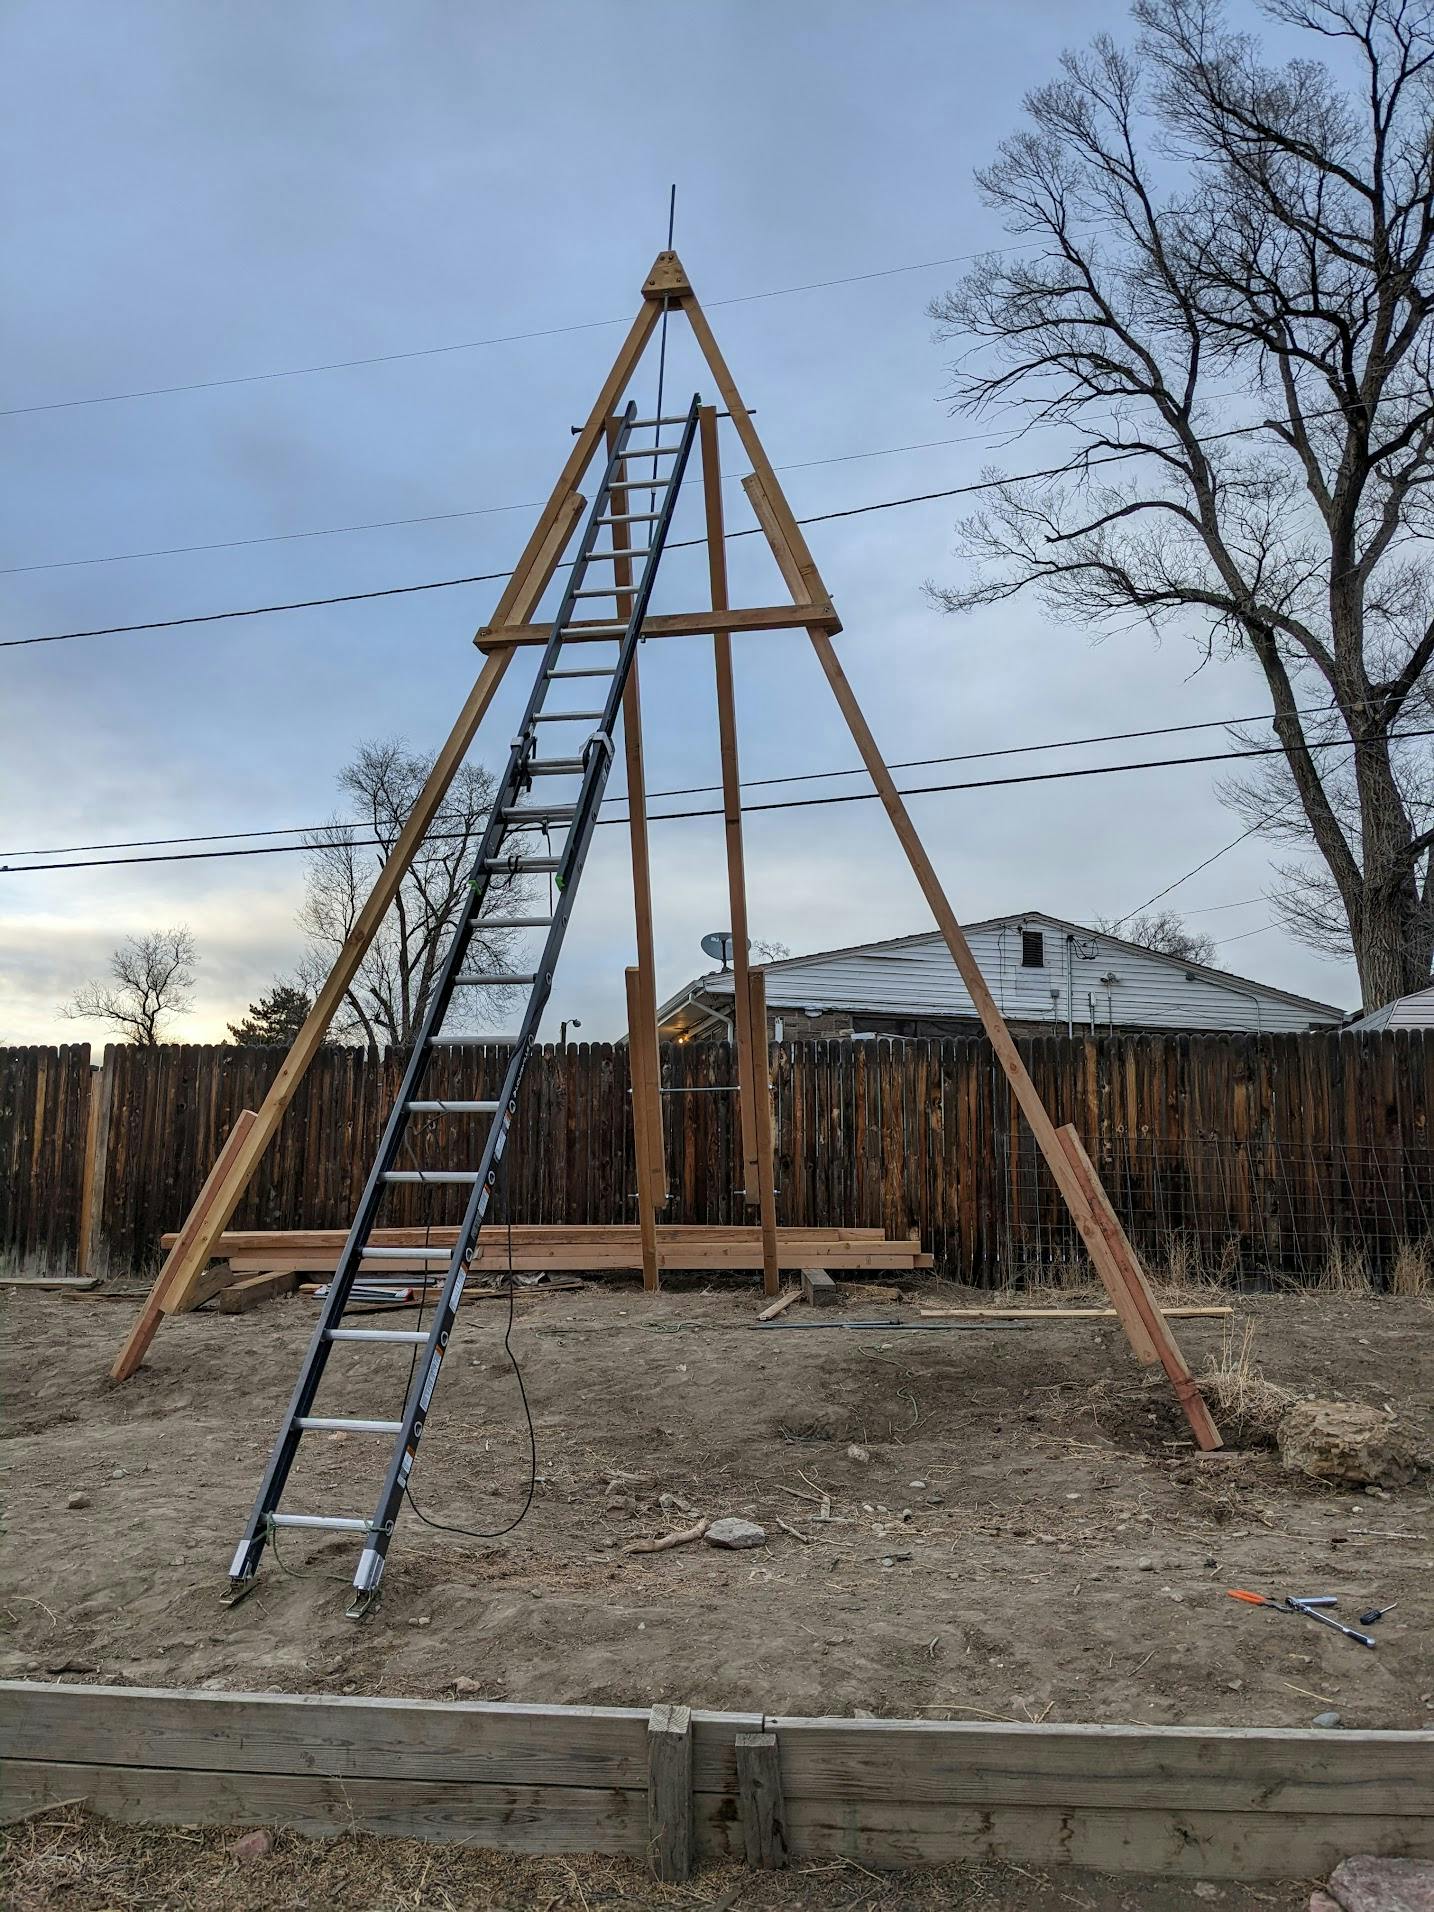
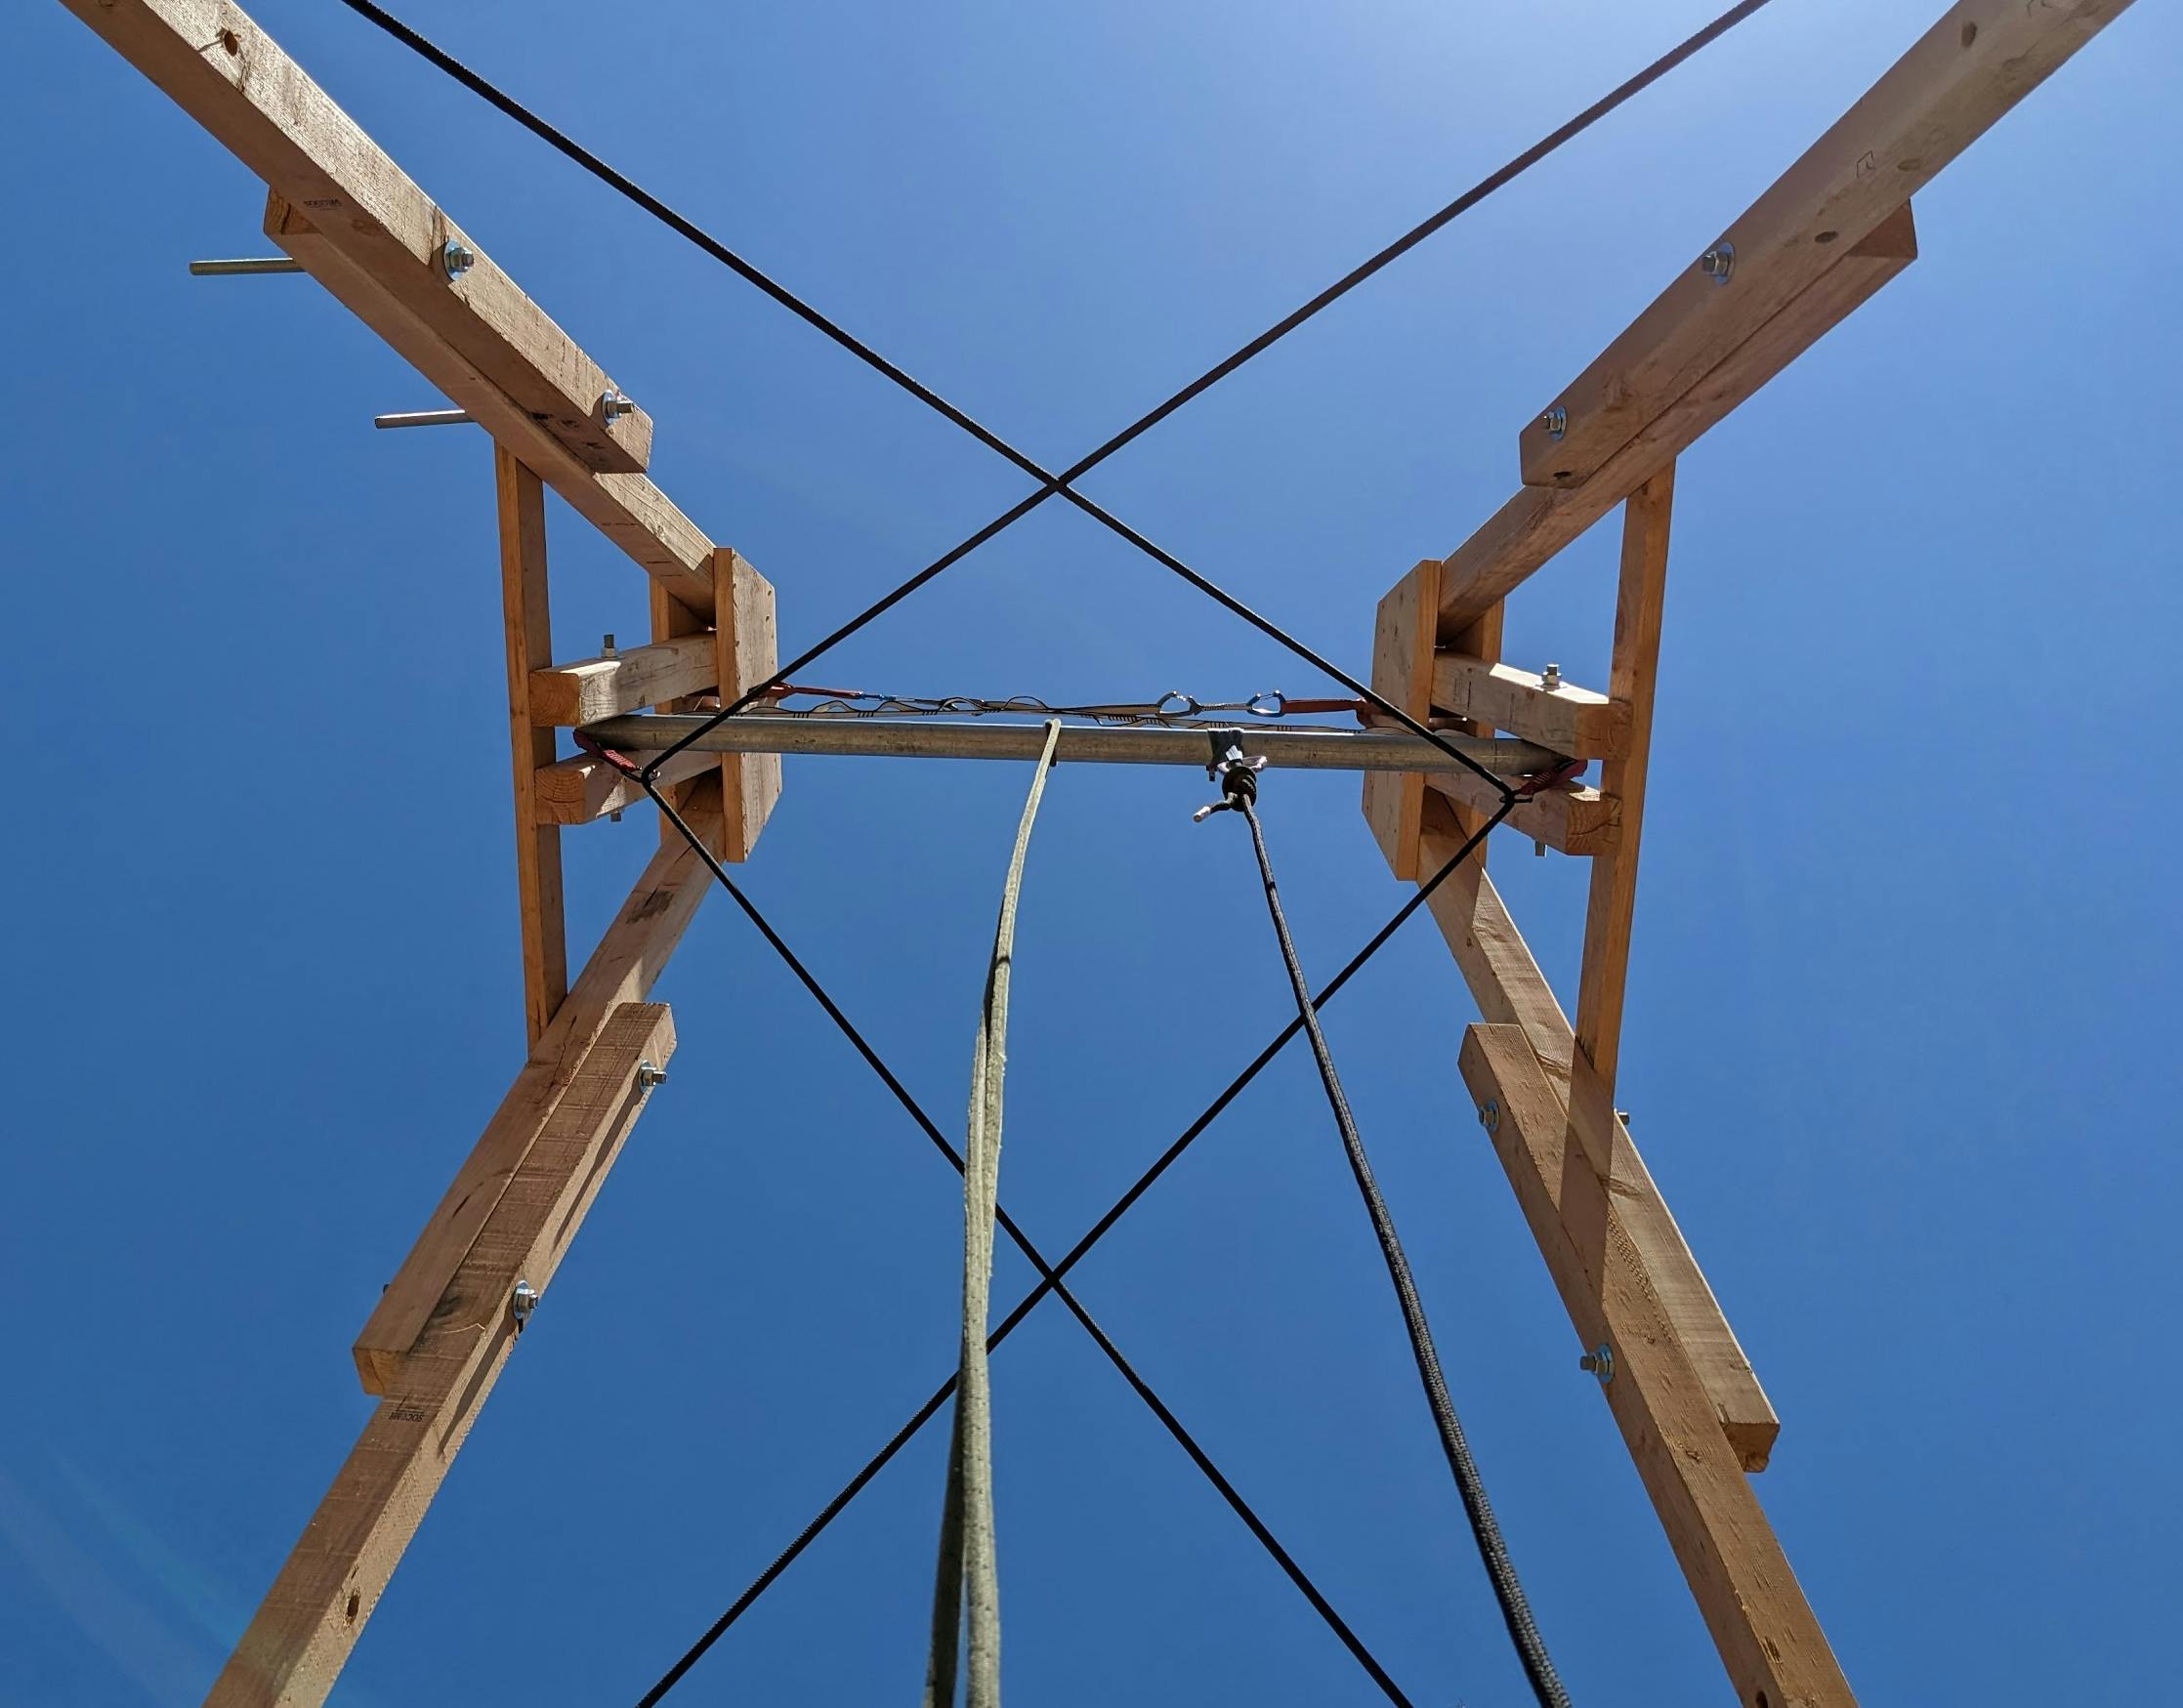
Success: the AA-frame
Recognizing the need to mitigate leg rotation from the start, and also the need to have only four long beams, I tried using A's for either side instead of across the middle.
A hazard of this design is that both A's could tip in the same direction. Once that started, it would be difficult to stop. The center of mass could easily extend beyond the feet and it would topple. I tried to mitigate this with a threaded rod along the top, but I found that diagonal webbing straps in an X pattern were more effective.
When both A's were as close to vertical as the straps would allow, there was very little wobble. Both straps were under tension which kept the A's at a fixed angle to the pole.
I would construct it by dragging the feet of both A's toward each other.
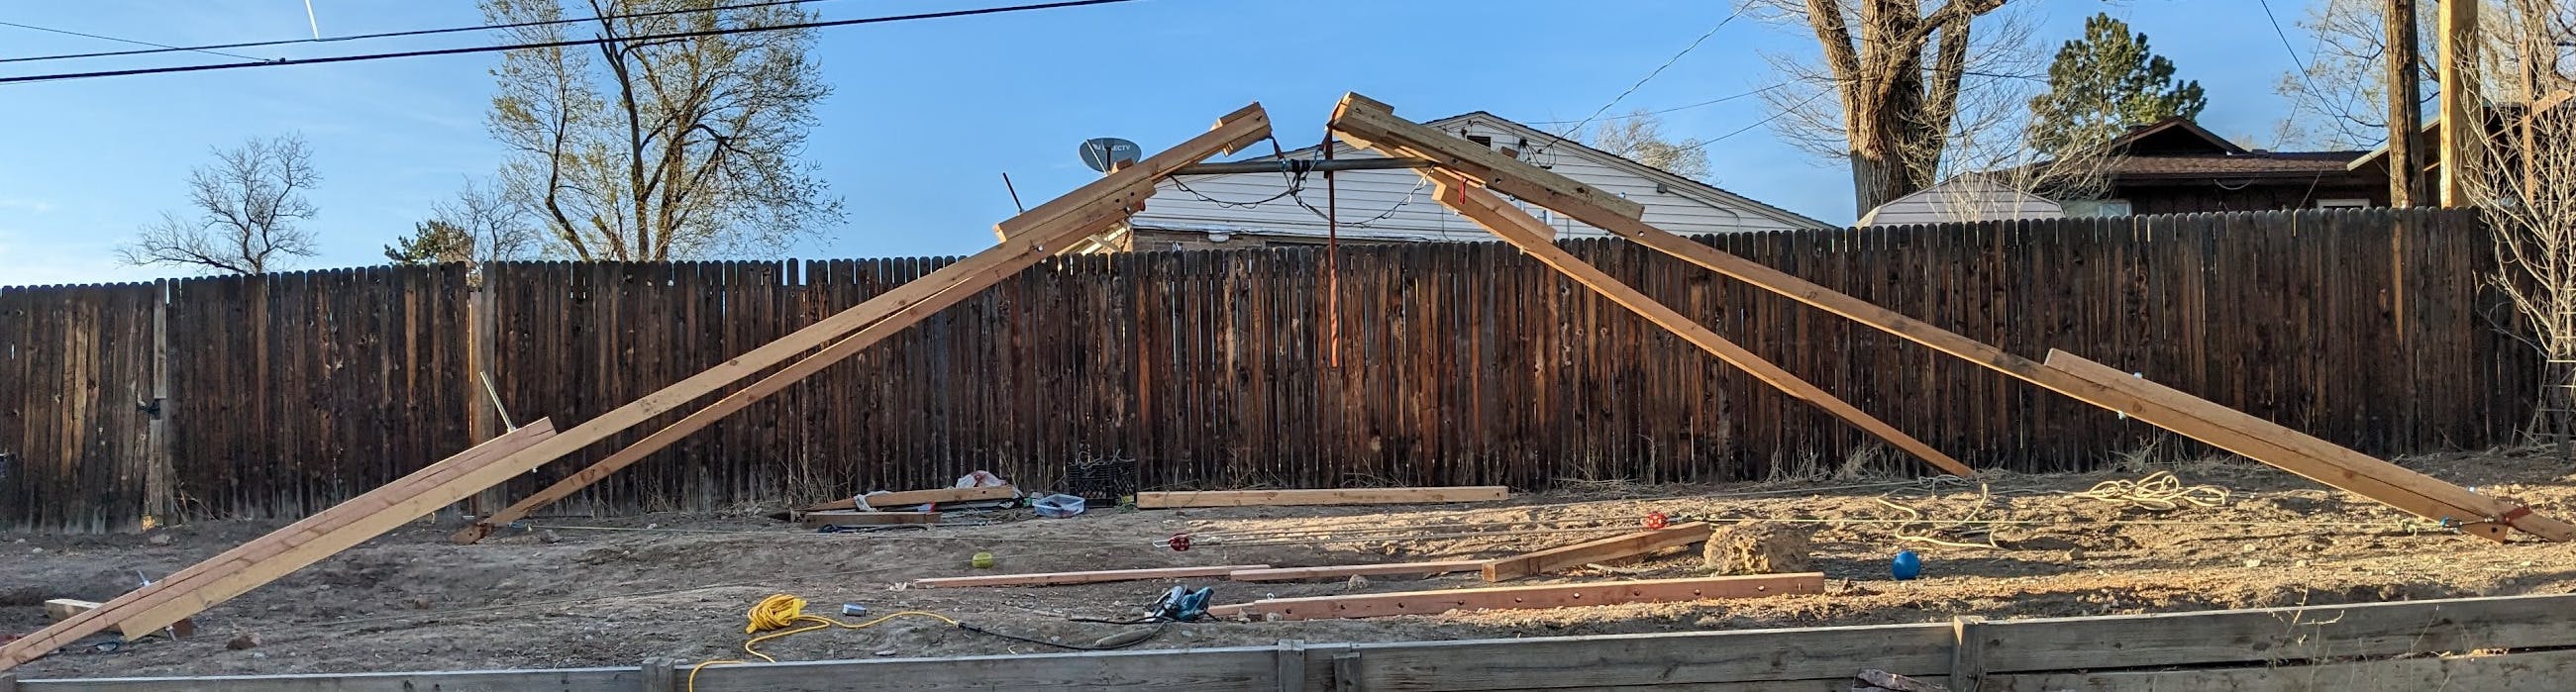
This would take it through a phase where the A's were not yet vertical enough to tension each strap. In this mode, it would sway to one side or the other, but the straps would catch it before it toppled over.
At first, I found it very difficult to drag into a vertical position, even with my strength augmented by pulleys. This was even the case when I added an extra pulley and an ascender to save my progress.

Then I discovered that what little progress I was making was dragging furrows in my yard. After wedging some plywood under the feet to act as skis, dragging it became much easier. Later, I would have friends pick up the contraption's feet while I used the pulleys.
Here you can see the structure swayed away from the camera, so only one of the X-straps is taught. Also pictured here is my strategy for handling uneven ground, which is to make the feet longer on the downhill side.
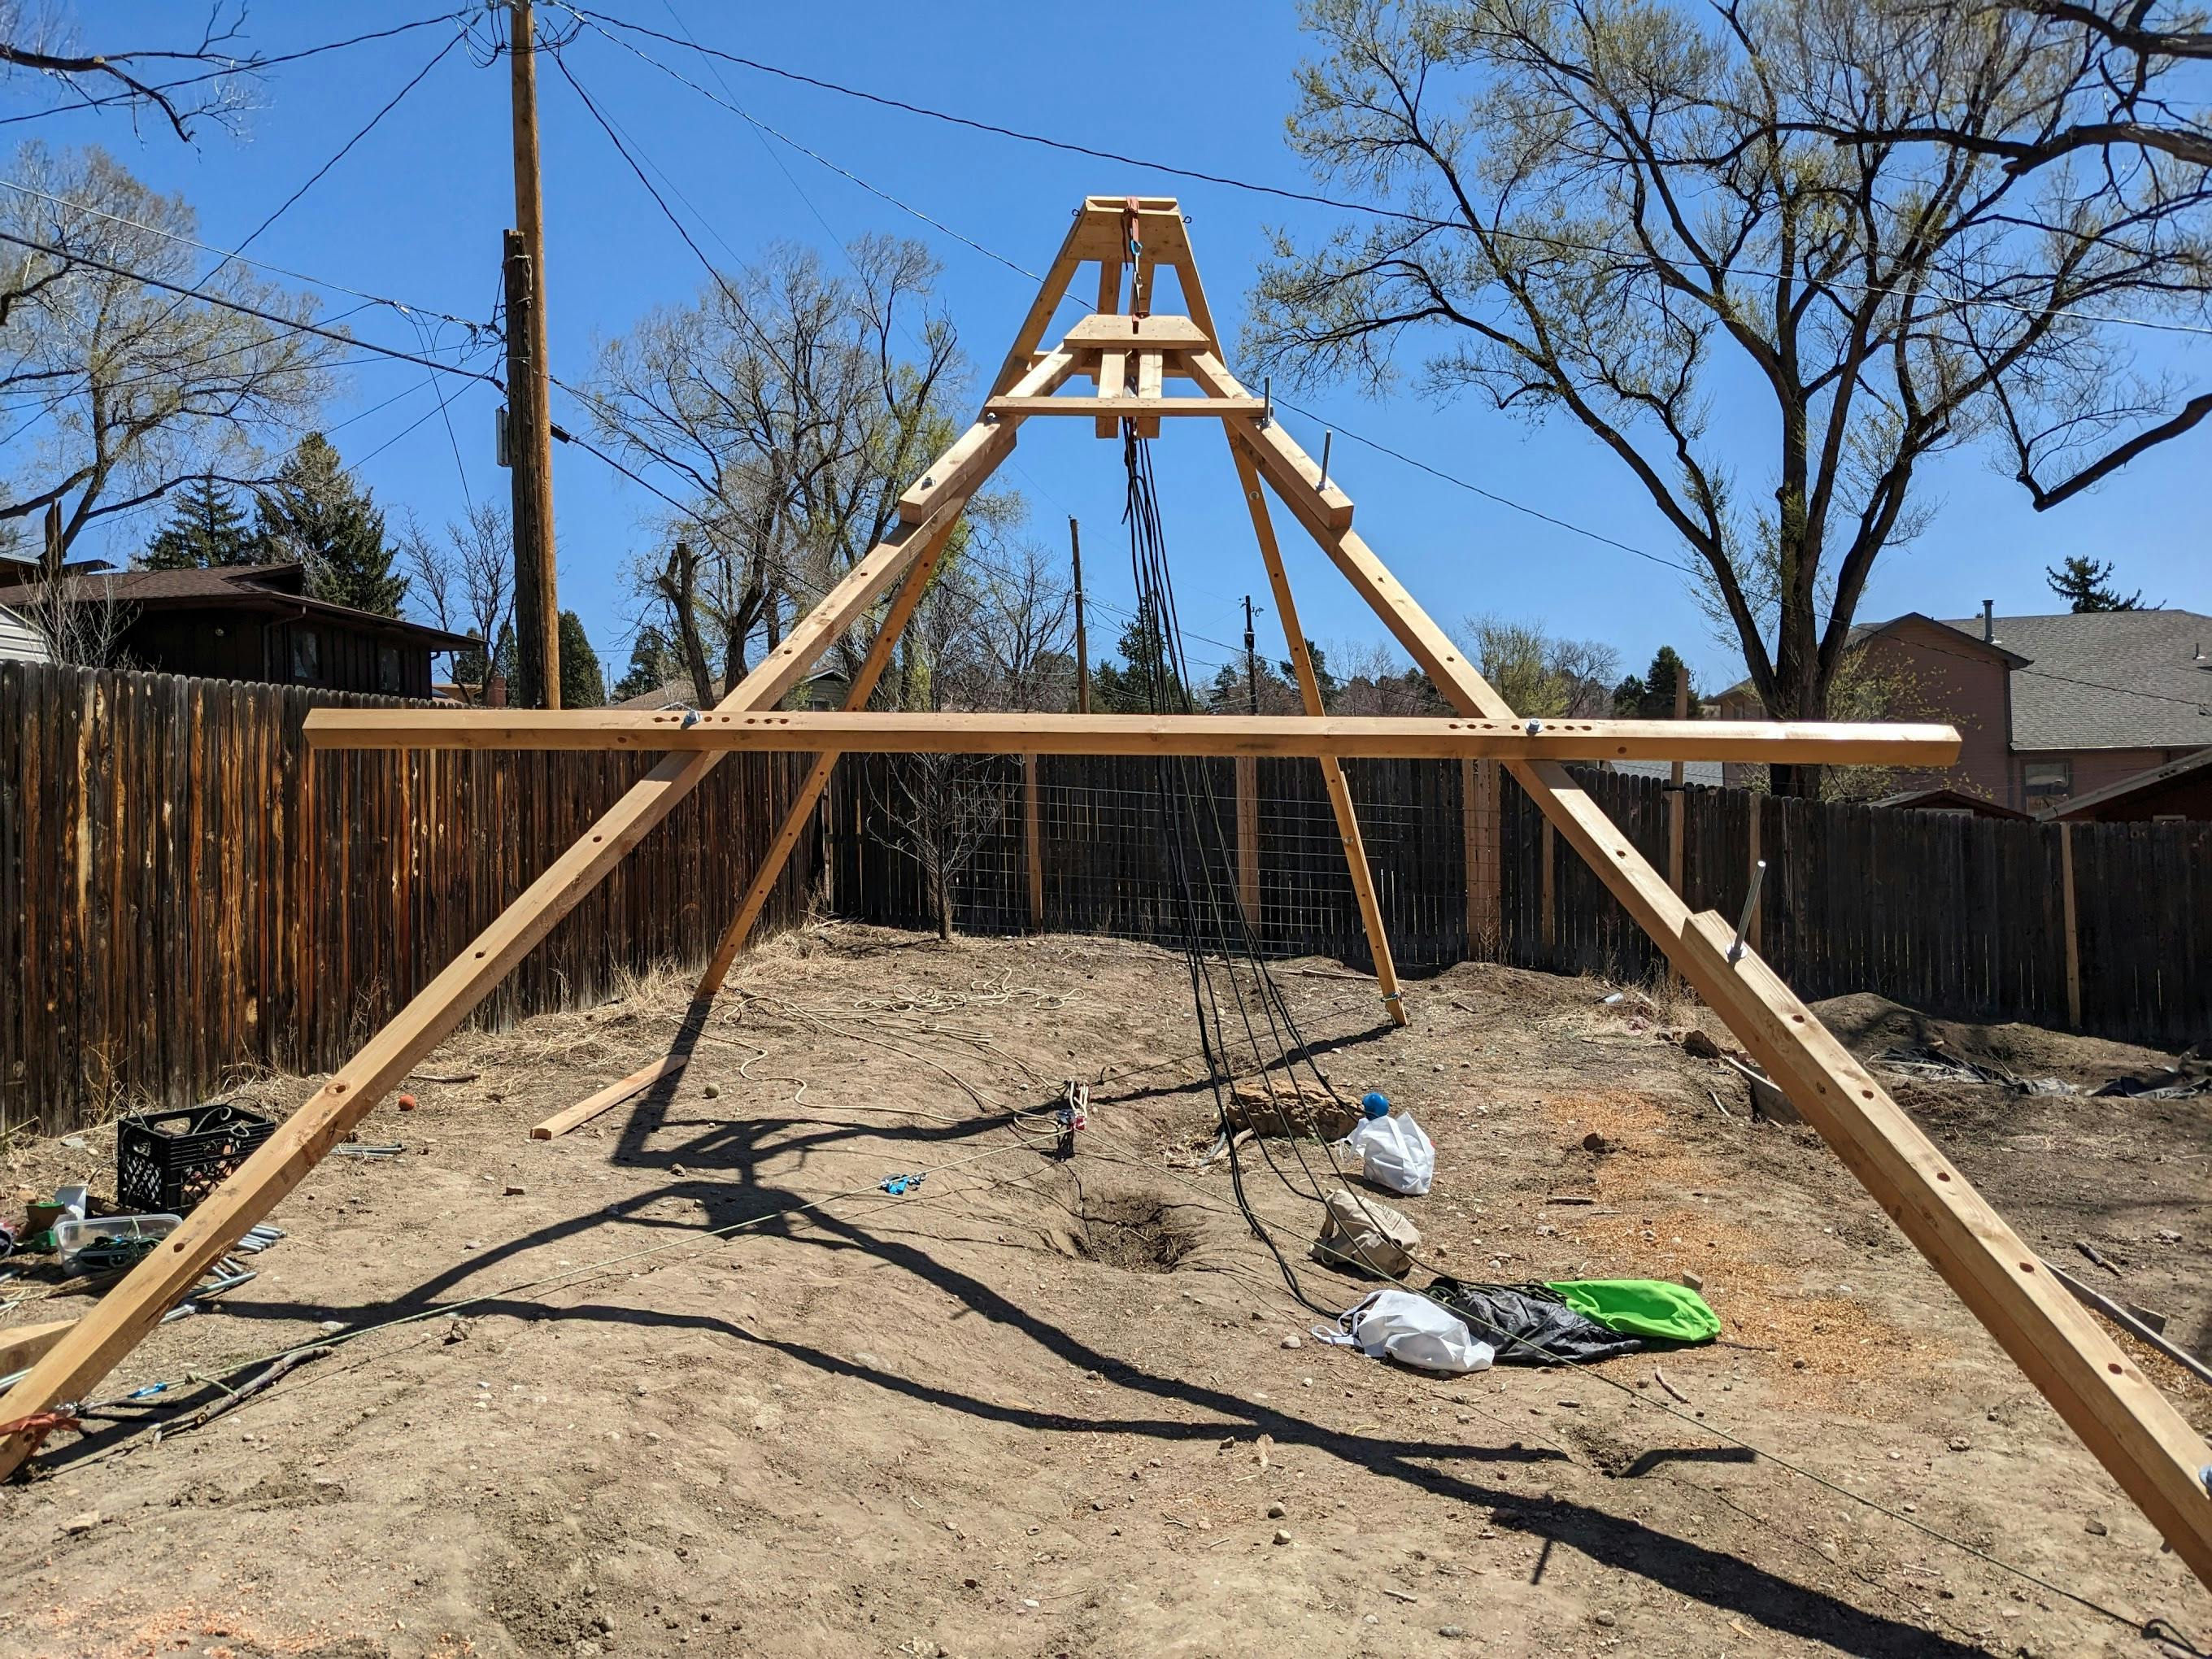
Once the straps at the top were under tension I attached the other crossbars. Below you can see just one of them. I also attached a static line for ascending and a doubled-over rope so that I can be belayed while I ascend.
In this mode, I noticed that it had a concerning amount of wobble, so I added some internal tension, which helped.
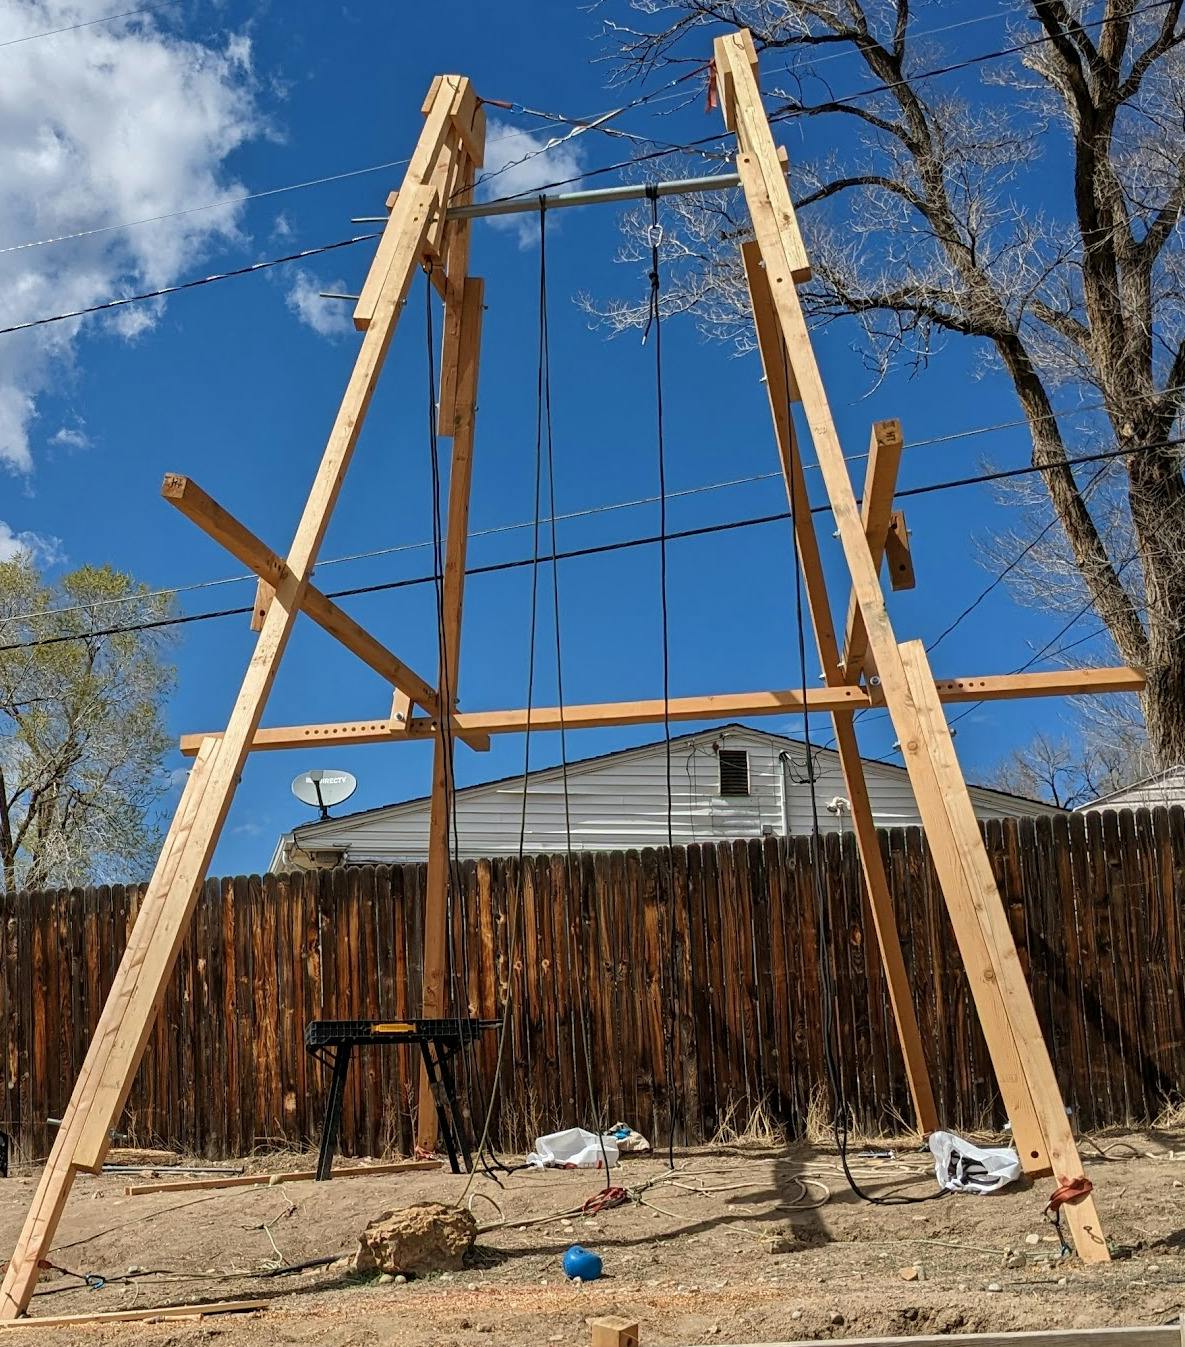
Following this, I added the crossbeams and attached a pair of telescoping PVC pipes to be my roofline.
I had assumed that the roof would be depressingly saggy with just a single support, so I fashioned something out of scrap material to hold a second roofline up.
I'm not sure if this was necessary, because we ended up anchoring the other end of the roof without such a contraption and it turned out ok.
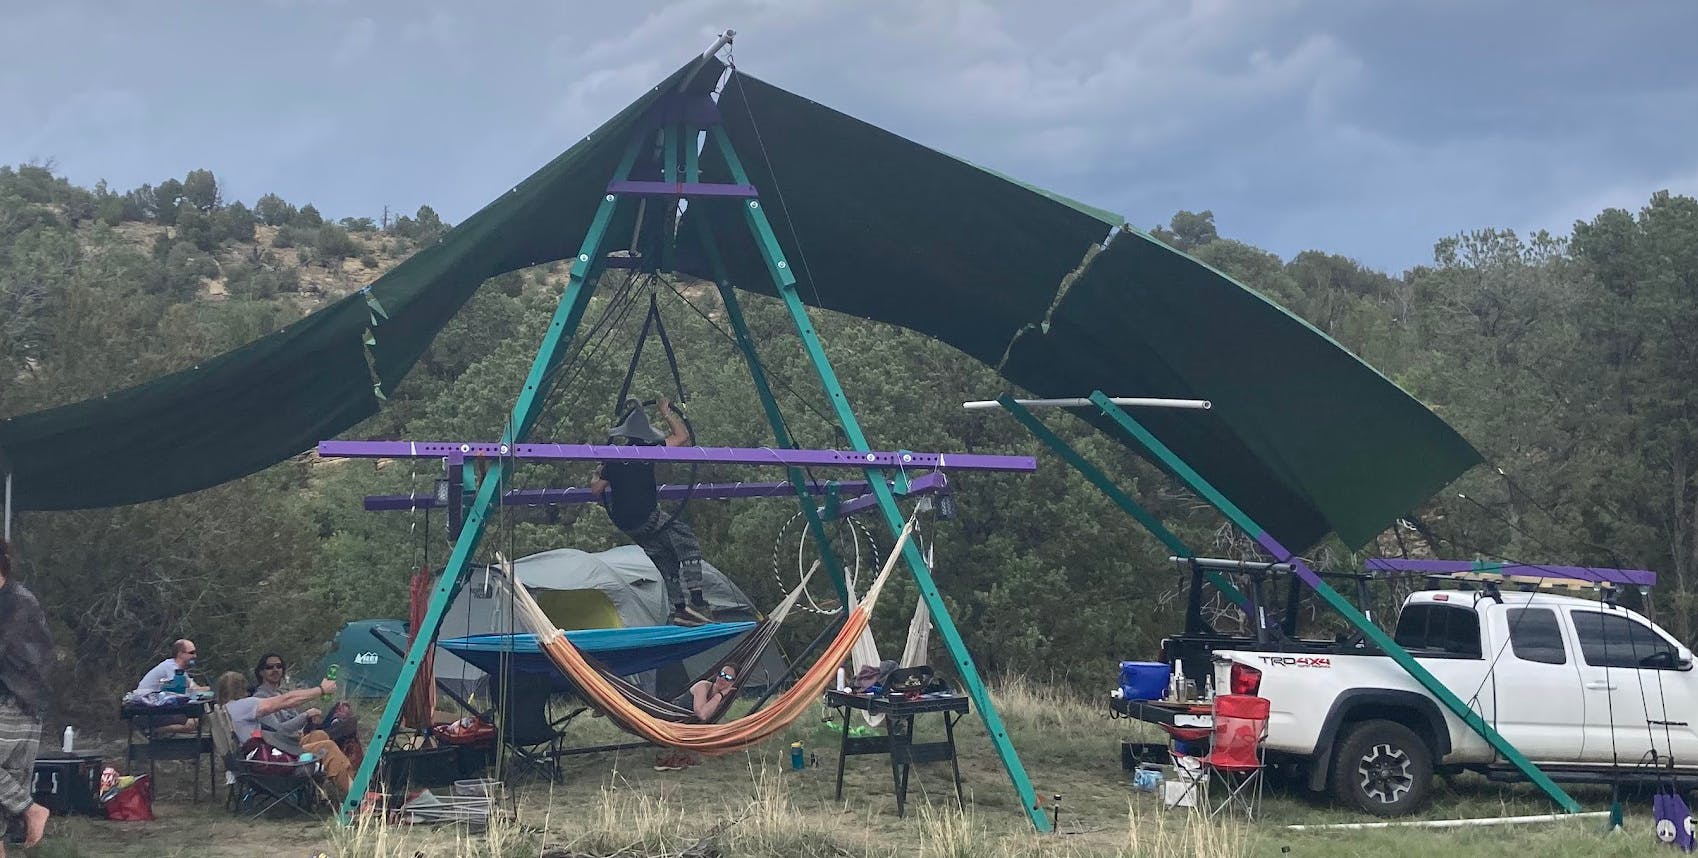
Pictured above is a gust of wind from the left. It pulled upwards on the rightmost roof, which is connected (via 12' bungee cords, through some pulleys) to sandbags. The idea was that the roof should be very loosely connected so that instead of creating tension and breaking something, the wind just lifts enough weight to exhaust its energy and then later that weight pulsl the tarp back into its desired configuration.
It worked, but it wasn't windy enough to be sure how necessary it was.
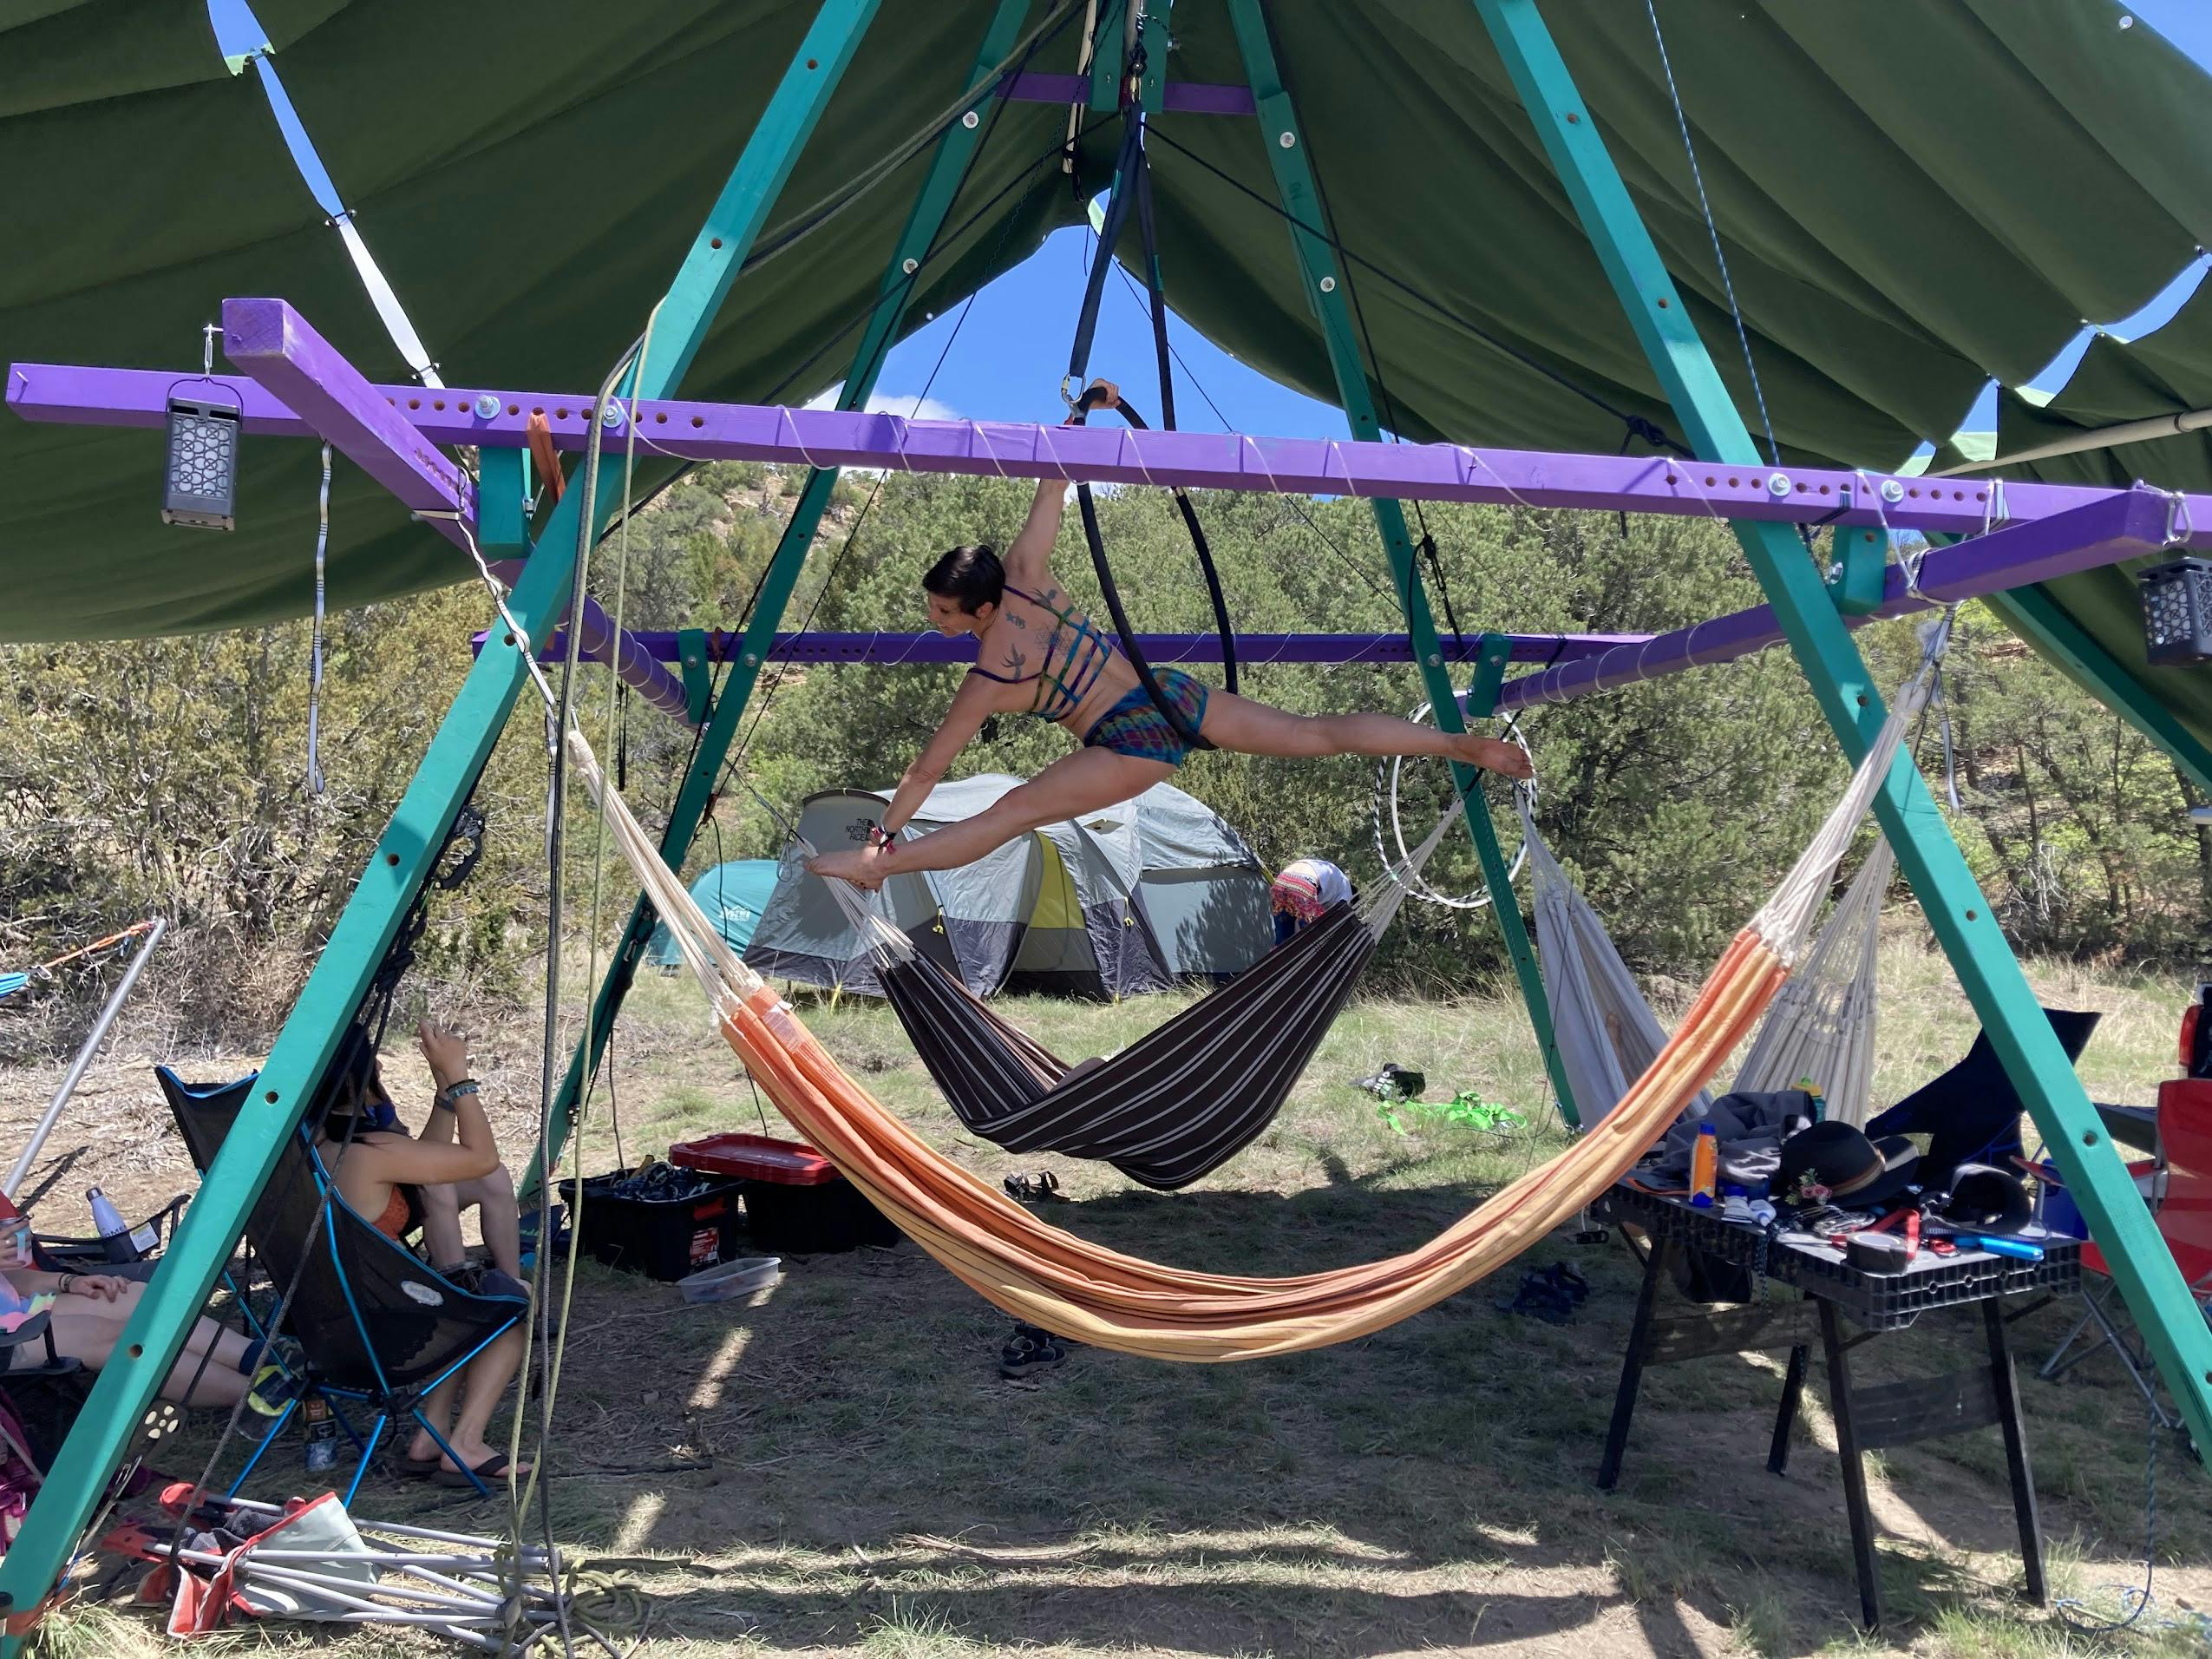
An aerialist in the shade was my 2022 goal, and here she is (thanks to Colleen for making the trek up the hill).
Summary
Three journeys to Apogaea, three versions of the plaza. So far, each has been an improvement on the previous one.
I wanted to get the story into a blog post so that I can explain what I'm working on with a hyperlink instead of a lengthy discussion, so here you have it: a blog post.
Some Reflections
Letting Them Find You
There's something to be said for making a spectacle of oneself.
Did you know that there are camp structure nerds (besides me)? There are. And if you make an ambitious enough camp structure, they'll hike up a hill to come to talk with you about it. I made some friends and had some very fun conversations that were full of ideas for Version Four.
Practicing with Authentic Timelines and Consequences
As someone whose workday worries are very abstract (I write code), there was something therapeutic about periodically having achievable tangible goals and feeling their effects directly.
For instance: I wanted to get it sanded and painted early so that it stopped giving me splinters. That happened later than planned, so I got a lot of splinters.
When I finally corrected this, the satisfaction was... different. I'm no stranger to consequences, I break things in the code and then have to fix them all the time. But something about having those consequences be so tangible as a splinter felt therapeutic, even when the splinters themselves were a serious pain.
Better to Just Call it Art
I am not accustomed to calling myself an artist, but I've very recently acknowledged that this is an art project. That's too fresh a shift for me to say how it'll be impactful, but it feels important. It also seems to help set expectations when I'm talking about it with people.
Version Four
There's lots of time to dream between now and Apogaea 2024, I can't yet say for certain what the next version will look like. But here are some musings:
Reuse more from previous iterations
Big shade roof, small (easy deploy/stow) rain roof(s)
Less coupling between systems. The ambitious parts should be able to fail without the whole thing being a bust.
Parts that can be easily moved to reposition shade based on where the sun is
Tensegrity?
Seek excuses to acquire metalworking skills